Water leaks into cockpit

Discussion about MX5s, Roadsters & Miatas, not directly fitting into one of the categories below. Please keep it on topic.

Moderators: LilRay.Sun, Furai, Growler, zorruno, jif

GRUVBB
I am quitting my job and going 5-ing
Posts: 677
Joined: Sat May 04, 2013 4:50 pm
Location: Fastlane to Ak

Water leaks into cockpit

Post by GRUVBB » Wed May 08, 2013 6:04 pm

Apologies in advance if I'm asking about a topic already on this site. My computer is as slow as an old 386 running on DOS so takes forever to trawl through previous posts.

Leak 1;
I have intermittent water leaks onto passenger floor pan. Have not been able to track where originating from until I get to strip out seats and carpet etc.
I know about the drainage holes but would like to clarify a few points. I believes there are one either side of seat to drain water from soft top. These are clear as I regularly pass a flexy rod through them. The flappers were full of sludge originally.
I park on a hill facing downwards. I suspect that the reservoir catchment area fills up and overflows over the front lip as the car does not sit level. All the flow migrates to passenger side. The drain is located at the rear of catchment space and perhaps in the torrential downpours overflows before drain starts to divert down to ground level. (DIY diagnosis) :idea:

I have dug a new car park space at home so car sits level but still on a slop.
Will try parking it on mechanic ramps to get car more level in all planes.

Leak 2. If I park with front of car elevated up hill it rains onto drivers right knee between soft top and rubber gasket on top of windscreen.
I have adjusted running thread on soft top latch to increase tension to no avail. Are these the latches that I recall someone saying can be rebuilt with inserting new plastic bush or something????.
I park facing downhill but the passenger floor pan then suitable for tropical fish rearing.
How tight should the latches be to secure efficiently without over stressing the roof fabric?

Do I then need to put ramps at rear of car when parking.

I have checked that drainage holes intop windscreen rubber are clear by pushing silphos stick through them. They are not ripped or blocked.... Are they supposed to have those holes in the rubber? They look genuine.
Leak 3;
Once again with heavy rain I sometimes get a wet seat.( not a good look if going on a date).
Once again I suspect the leak could either be from the crease where soft top folds. It is slightly worn for approx 30 mm.... Sorry unable to load pics to demonstrate hence the verbal diarrhoea explanation.
The rubber seal is sectional to allow for folding. Where they meet with a sort of mitred finish is where the water appears to come from.
Of course when I put the hose on the car nothing is evident.robably going to strip out seats and carpet and check things out once weather improves. I no longer have a garage... :cry:
The rubbers all appear intact and flexible.

Any ideas would be greatly accepted. Sorry about long spiel but wanted to document all that I had checked with my ever increasing knowledge to avoid being told to check things I already have.

GRUVBB
I am quitting my job and going 5-ing
Posts: 677
Joined: Sat May 04, 2013 4:50 pm
Location: Fastlane to Ak

Water leaks

Post by GRUVBB » Wed May 08, 2013 6:08 pm

PS. There are also two drain holes at each corner of windscreen I believe these also are clear.
I worked out and cleared the four drain points on bottom rails after hearing water sloshing after raining

Are ther any more located on car other than two at front two at soft top and two seta of two at jacking points.

Thanks in advance again.

MrGrey
I have stars, you haven't. Deal with it
I have stars, you haven't.  Deal with it
Posts: 1172
Joined: Mon Jan 21, 2013 3:52 am
Location: Northland

Post by MrGrey » Wed May 08, 2013 6:22 pm

never apologize for being verbose, it helps with diagnosis :wink:

I personally don't know much about the drainage holes, so hopefully someone else knows about that, but my first thought is to see if the seals on the softtop are replaceable....

otherwise, (and I know this is an expensive option) how about considering getting a hardtop? you should be able to pick one up for $1-1.5k (ignore the rip off artists who ask for more)

a hardtop would give you good winter protection and it will stop scumbags with pocketknives from slashing your soft top.

SLYDIT
Keep calm, Forum Moderator here.
Posts: 1610
Joined: Sun May 21, 2006 6:18 pm
Location: In the Garage.

Post by SLYDIT » Wed May 08, 2013 7:39 pm

most common source of leaks are the rain rail cracking and the drains just behind the seatbelts blocking. also the passenger side has a drain down in the footwell on the tunnel that goes from the air con box down through the floor. often if mechanics have had the gearbox out or been fiddling with the ecu, the hose can get dislodged and drain onto the pass' floor instead of outside. oh and check that you r soft top seal about half way along the top edge of your windows dont leak. that join often drips when raining.
RED '90 TURBO.
SCARING PRIUS DRIVERS SINCE 2002

MrGrey
I have stars, you haven't. Deal with it
I have stars, you haven't.  Deal with it
Posts: 1172
Joined: Mon Jan 21, 2013 3:52 am
Location: Northland

Post by MrGrey » Wed May 08, 2013 10:36 pm

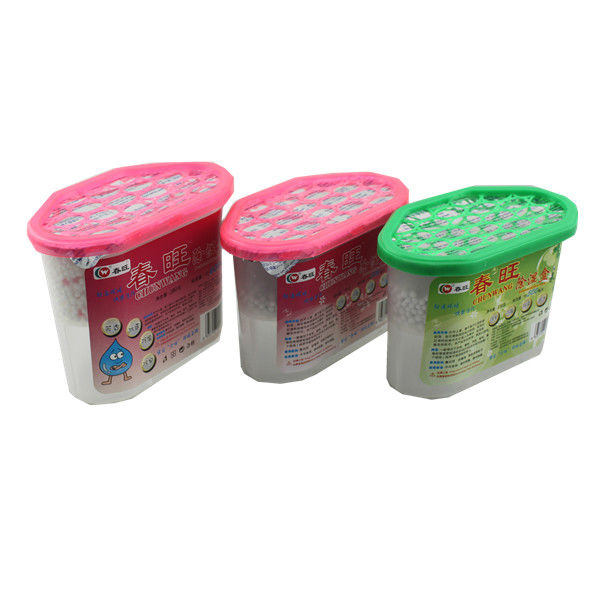
oh, one other thing which may help a little is to get one of those moister absorber container thingys which may help neutralize the musty smell a bit. I realize this won't help the leaks at all, but I loathe that wet musty smell of a leaky car.

Image

ross
See my 5 and raise you.
Posts: 91
Joined: Sun Jun 10, 2007 10:53 am

Post by ross » Wed May 08, 2013 10:54 pm

Make sure your soft top latches are adjusted so that the roof pulls down tight on the window tops.
Check theres a good seal between the top of the window and the soft top seals.
Window can be adjusted easily.

Latches need to shut firmly so hood is under some tension.
Also pull the 2 soft top top rubbers together as they tend to move apart.

Check the plastic nose is on the soft top latch so it sits properly in the catch.

GRUVBB
I am quitting my job and going 5-ing
Posts: 677
Joined: Sat May 04, 2013 4:50 pm
Location: Fastlane to Ak

Water leak

Post by GRUVBB » Wed May 08, 2013 11:08 pm

Thanks SLYDIT.
The drain I was referring to is the ones beside seatbelt anchor point. The drain is clear and freely flows when I purge water through it. The front lip of the rectangular catchment area where the drain hole is located is only about 15 mm high. The drain hole is at the rear of this space. In a downward elevation I suspect the water flows over the front lip.... Being a Newbie I have not pulled many components off yet in my DIY lessons.
I think I can sort this out and confirm situation.

The front passenger drain you mention,... Would this be the condensate drain from the ac evaperator or part of the drain from up around the windscreen. I'm sure the windscreen drain is flowing ok and appears to be exiting behind wheel arch.

I think the drivers door is leaking at the sectional joint in the seal of the soft top. Is this due to the seal needing replacement or just occurs during super heavy downpours? I'll camp out in the drivers seat and monitor it with someone hosing it over the weekend..... Changing filters and fluids this weekend so I know where we are at. Cam belt and water pump are next as is a oil leak I suspect is coming from around the passenger cam area. I have degreased engine bay completely and oil has accumulated around plastic plate up above power steering pump. My fully trained mechanic will confirm this weekend rather than my electrician/fridgy diagnosis.

I'm keen to get these all sorted befor the carpets go musty and indeed to get some MR GREYS Bunnings damp absorber.
Lucky I got my shagadelic waterproof Bathmats in at the moment :lol:

broomfish
I have stars and not afraid to use them
Posts: 206
Joined: Fri Jun 27, 2008 8:10 pm
Location: auckland

Post by broomfish » Thu May 09, 2013 8:32 am

I have struggled with water leaks in the front over the years. Manly from the front roof seal.

The car developed a weird lack of power that after much searching turned out to be water damage to the ecu located under the false floor in the passenger footwell. Fortunatly i was able to clean the corrosion and the problem went away. Pay to check and clean yours if you have had a water leak
regards

Peter Lee
Broomfish
www.broomfish.co.nz

WideOpenThrottle
I have stars, you haven't. Deal with it
I have stars, you haven't.  Deal with it
Posts: 1293
Joined: Wed Dec 24, 2008 11:35 am
Location: 36.8167° S, 174.4167° E

Post by WideOpenThrottle » Thu May 09, 2013 10:52 am

Probably why they put the NB ecu's up higher by the seat belt towers.
1989 NA 1650
1998 NB 1800
2005 NC 2000
1990 Landcruiser
Surfboard
Push-bike
Hiking shoes

GRUVBB
I am quitting my job and going 5-ing
Posts: 677
Joined: Sat May 04, 2013 4:50 pm
Location: Fastlane to Ak

Water leaks

Post by GRUVBB » Thu May 09, 2013 5:42 pm

Big UPS to Broomfish for the location of ECU. Just removed carpet and I have
Located false floor tray. Corroded at bottom of course due to historical water ingress. Have pulled carpet back and thrown way under felt. Got heater drying it out. Would use ac but need to top up gas charge once I source a suitable r12 replacement. Can't be fagged retro fitting to 134a. When I'm not paid to do ac
It's hard to get the motivation.

Looks like there may be space to relocate ECU up behind rear of glove box. Mine has not sustained water damage but now I know prevention is better than lazy ignorance..... Oh for a shed to work in..... Why is it when I had a company car I had three farm sheds for vehicles and now I own a personal car I live with no sheds. :lol:

The ac condensate drain is intact.

I have now parked car with rear facing down hill. This allows water from ST to flow directly down drain. Hopefully this was water ingress point. Fingers crossed.
Comment to Mr Grey. ..if you place hand behind seat point anchor you will find catchment area. Approx half size of a hand print. The drain hole is in the middle at rear of this. It is about 15mm in diameter. This flows down flex pipe and exits below car between rear jacking point and beginning of rear wheel arch.
It has a sloping insert about 30 mm from exit point which acts as a type of one way non return gate. Gravity will allow water to pass through but should stop fumes and insects coming up. The dust and leaves that accumulate get blocked at this point which then create issues. Either pass a flexy thing down from cockpit cabin until it exits at ground level. You may be able to massage it with fingers to free any dirt obstructions. Flexy rod or plastic is best. Then put hose onto roof and confirm good flow from there. Bang. Just like new again.
Identical on both sides. I have taken pics and once I can post and learn how to do it will place the on here.... Where is a four year old when you need computer assistance???

Growler
Yes. I might just know (Trusted Advisor)
Posts: 433
Joined: Sat May 06, 2006 8:25 pm
Location: Auckland

Post by Growler » Fri May 10, 2013 2:09 pm

Have you checked the heater matrix underneath the dash. These don't normally leak...but you never know...

GRUVBB
I am quitting my job and going 5-ing
Posts: 677
Joined: Sat May 04, 2013 4:50 pm
Location: Fastlane to Ak

Water leaks

Post by GRUVBB » Fri May 10, 2013 3:49 pm

Have pulled bAck passenger side carpet. Removed ECU brackets. Only one fixing sheared off. Luckily it's one mounted on the rail so will be able to sort that easily enough...
Buy a replacement and a false floor pan at same time. Too much brown cancer on the metal for my liking.
Dried floor with heater on. Left car with nose elevated today whilst raining. No water evident around ECU rail
It would dam up against it if water ingress point above it. Water still pooling at rear of passenger side.
Noticed droplets on side of glove box surround.... Maybe coming through door rubber or between ST and door rubber.... pulled door rubber off and checked welded seams of panels. These are intact. Cleaned dust debris from inside of door rubber.
Will strip seat and carpet out completely and get the hose into action.

Checked the boot and I'm sure I saw a goldfish in there.
Wet carpet in boot well. Checked rubber and metal work. All appears ok. Removed cover plate over fuel filler pipe. Checked fuel filler cavity drain. Drains ok. No pooling in there and drain hose intact. Checked void behind fuel fill pipe and notice the small piece of carpet in there is wet....
Is this an indication of perhaps a rusty rain rail???
Not too sure how the water would get to there. I know it migrates easy. Is why I suspect the rail.... Have only been pulling car apart for a Few days now and learnt HEAPS.
Checked the chrome hinge mounts for boot which were tight.
The tail lights have been siliconed in by previous owner so perhaps that was an entry point.
Going to strip them out remove the silicone and reevaluate situation. I know some silicones are corrosive to metal so not wanting any on car at all.

The process of elimination can reveal many other issues if done with an open mind.... I got to dust all the hidden metal work behind panels etc.
There was no pooling in the jack and tool well or the void on drivers side beneath rear window.
Taking pics to load for benefit of others interested once able to.

Basically my only query at this stage to the knowledgable is.... Could the rain rail be rusty and allowing water into the passenger side void under rear screen.
How long does it take to remove ST to access rail for confirmation?
Any pitfalls to watch out for?

Thanks for reading and input.
Have a super weekend. I'm off to do fluids now... Car first then me.

WideOpenThrottle
I have stars, you haven't. Deal with it
I have stars, you haven't.  Deal with it
Posts: 1293
Joined: Wed Dec 24, 2008 11:35 am
Location: 36.8167° S, 174.4167° E

Post by WideOpenThrottle » Fri May 10, 2013 5:20 pm

Its fairly common for tail lights to leak so if you use any silicon make sure its neutral cure [common nowadays] and not the corrosive acetic cure which may be still around.
The soft-top rain rail is plastic so it shouldnt leak unless split somehow.
If the boot -lid rubbers aren't touching all round for a nice seal then water could be over-flowing into the boot.
When your windows are wound up they should impress upon the soft-top rubbers [not too much] and sit parallel with the softop.

Sounds like you are making headway and slowly getting through the mx5 quirks!

MX5's were invented for top-down sunday summer drives with no rain in sight! :D
1989 NA 1650
1998 NB 1800
2005 NC 2000
1990 Landcruiser
Surfboard
Push-bike
Hiking shoes

broomfish
I have stars and not afraid to use them
Posts: 206
Joined: Fri Jun 27, 2008 8:10 pm
Location: auckland

Post by broomfish » Sat May 11, 2013 9:35 am

what you have described is pretty much exactly what i had which was caused by a cracked rail rail at the bottom of the soft top after the installer of the soft top broke it :-(

rain runs onto rear parcel shelf then onto panels underneath which then runs back into the boot and forwards onto the floor.
regards

Peter Lee
Broomfish
www.broomfish.co.nz

GRUVBB
I am quitting my job and going 5-ing
Posts: 677
Joined: Sat May 04, 2013 4:50 pm
Location: Fastlane to Ak

Wet cockpit

Post by GRUVBB » Mon May 13, 2013 5:54 pm

Thanks Broomfish. Seen a bit of surface rust on the clamping rails at bottom of rear screen. Applied water to window and VOILA there are the little water falls wiggling their way in.
Will borrow a shed this weekend and remove roll bar carpets and screen anchoring nuts etc. Pretty sure the rail is going to be NFG....( No F#*~¥% Good),
Does anyone know of the best deal for a replacement please? I am assuming best to use a new one due to the access and associated thanks to everyone contributing both here and other posts. At this pace I will have a MX5 TRAINSPOTTER badge on my scout blanket in no time at all. Some great ideas and replies to be read here. Well done everyone

MrGrey
I have stars, you haven't. Deal with it
I have stars, you haven't.  Deal with it
Posts: 1172
Joined: Mon Jan 21, 2013 3:52 am
Location: Northland

Post by MrGrey » Mon May 13, 2013 6:15 pm

are any of the leaks seal-able?
I use "windscreen sealant silicone R.T.V" from Sellys. The shelf price at work is about $16. Its basically a black sticky silicon that you could possibly squirt into the leaky gaps.

all dependent on where the leaks are of course.

GRUVBB
I am quitting my job and going 5-ing
Posts: 677
Joined: Sat May 04, 2013 4:50 pm
Location: Fastlane to Ak

Water leaks

Post by GRUVBB » Mon May 13, 2013 6:28 pm

This is where the water appears to enters where finger pointing to. I am assuming that the rail is behind the elliptical shaped rubber at bottom of screen. Have not remove these components yet so not sure. There feels like someone may have applied a sealant at some stage. Will remove screen to confirm status of rail. Maybe will be able to RTV once it is out. I have Non Acetic sealer in my stock room. Will make that call once eyeballed.
We'll I would post the pics but my Connection does not seem to allow pics. Not sure how to load. Read the FAQsection to no avail. Do I need a special programme or a child to try it? I clicked add an attachment. Typed some blurb cause it told me to in the file comment box. Then I push Add Attachment but nothing more seems to happen

WideOpenThrottle
I have stars, you haven't. Deal with it
I have stars, you haven't.  Deal with it
Posts: 1293
Joined: Wed Dec 24, 2008 11:35 am
Location: 36.8167° S, 174.4167° E

Post by WideOpenThrottle » Mon May 13, 2013 8:22 pm

My pics have to be around 1100 x 900 pixels to load
1989 NA 1650
1998 NB 1800
2005 NC 2000
1990 Landcruiser
Surfboard
Push-bike
Hiking shoes

SLYDIT
Keep calm, Forum Moderator here.
Posts: 1610
Joined: Sun May 21, 2006 6:18 pm
Location: In the Garage.

Post by SLYDIT » Mon May 13, 2013 8:24 pm

you can get the rain rail gutters off ebay anywhere from 60 -150bucks
RED '90 TURBO.
SCARING PRIUS DRIVERS SINCE 2002

GRUVBB
I am quitting my job and going 5-ing
Posts: 677
Joined: Sat May 04, 2013 4:50 pm
Location: Fastlane to Ak

Water in cockpit

Post by GRUVBB » Mon May 13, 2013 9:01 pm

Thanks for the heads up on rain rails on EBay. Just had a look onthere. Newbie for that also. Seen a range of rails available. Guess this thread winds to an end. I will raise a new thread for the next barrage of queries under appropriate heading. Thanks everyone.

GRUVBB
I am quitting my job and going 5-ing
Posts: 677
Joined: Sat May 04, 2013 4:50 pm
Location: Fastlane to Ak

Post by GRUVBB » Sat May 18, 2013 10:17 pm

I met Peter from BROOMFISH the other who proved to be a very pleasant person to chat with (thanks ffor your time Peter). We werediscussing rain rails which I am having an issue with. He told me that he knew of a car that had a roofing flashing installed in lieu of an overpriced genuine rail.... While I was investigating Dektites I notice that they do a product called Dekstrip. The narrowest profile is 185 mm. I will try and source some and se if I can fabricate a replacement with some DIY ingenuity. Will take pics when goin down that track if others are interested..... Steve do you sell that at your work. Have a look and let me know your opinion. I know you like DIY systems.

MrGrey
I have stars, you haven't. Deal with it
I have stars, you haven't.  Deal with it
Posts: 1172
Joined: Mon Jan 21, 2013 3:52 am
Location: Northland

Post by MrGrey » Sat May 18, 2013 10:59 pm

yep, I'm familiar with the stuff and am pretty sure we stock it. With time and patience you could most probably do a good job on the cheap. (I would personally mount it recessed enough so that you can get a coat of filler or silicon over it for a good finish). When looking for it start in the plumbing section and ask a team member where they are hiding the roof flashing.


Your main conundrum is how you would affix and seal it.

GRUVBB
I am quitting my job and going 5-ing
Posts: 677
Joined: Sat May 04, 2013 4:50 pm
Location: Fastlane to Ak

Post by GRUVBB » Sat May 18, 2013 11:08 pm

I can not remember from last usage how wide the aluminium strip on it is. You could rivet through this or use a machine screw and nut..... I have not taken my rail out yet so have not become an overnight expert (x is and undefined quantity and a spurt is a drip under pressure). Once this liquid sunshine in AK subsides I will be into it. Will take pics and ask MrGrey could perhaps load them up on my behalf for all to see..... Guess I should PM him first on that???

MrGrey
I have stars, you haven't. Deal with it
I have stars, you haven't.  Deal with it
Posts: 1172
Joined: Mon Jan 21, 2013 3:52 am
Location: Northland

Post by MrGrey » Sat May 18, 2013 11:36 pm

no worries, happy to help.
if I recall correctly its about 20mm but I think there is a 10mm strip version. Don't quote me on this however, its been a little while since I paid them much attention.

MrGrey
I have stars, you haven't. Deal with it
I have stars, you haven't.  Deal with it
Posts: 1172
Joined: Mon Jan 21, 2013 3:52 am
Location: Northland

Post by MrGrey » Tue May 21, 2013 10:54 am

the following post is posted on behalf GRUVBB due to ipad limitations
Further to my water leaks I decided to pull out my rain rail for inspection today. I was aware of how much a replacement is so had already done some research on materials which could possibly help to seal it up.
I had never seen a soft top removed from a car and this is what I discovered. The rubber C channel was intact except for three small tears from the top. This did not extend down to the bottom of the C profile. The plastic backing plate was in a compromised state. Someone had already had a go at repairing it. The holes had been elongated and split which did not create a seal once the bolts clamped it into position. This was the case on drivers side, passenger side and also along the mid section.

Image

Image

Image

I purchased a roll of Damp Course. Retail price $22 and a can of Matt Black spray can retail $16.
Asked for trade discount for cash and paid $22 in total.
Image

This what the product looks like. It is available in a range of widths and is flexible.
Image

I slipped a length in to cover the broken plastic strip and tacked it in with small smears of silicone. I used pegs to hold it in place for about 1 hour to let it stick so that when the top was wrestled back into place it would not fall away. It just protrudes above the plastic backer.
Image

Image

Image

Once the silicone had set the insert remained stuck to original plastic backing plate.... It would be best to,leave it overnight to fully cure and set. However I did not have a shed to work in and the rain was coming so had time constraints.
I then drilled through the plastic mounting holes so new membrane would locate over securing bolt studs with a 6 mm drill bit. Be careful not to drill into the soft top or your fingers. This would best be done after 24 hours once the silicone had set. This would stop it from slipping out of alignment.
I then reassembled top and fitted freshly painted clamp rails.
Because the soft top has a radius from rear mid section to front of screen the membrane drops away as it rolls towards the front of the car. I may need to tweak the seal in tis area. I inserted a second piece of membrane at each radius being careful to lay it so that the water still channels towards the rubber rail.
The 90 mm membrane then located back up behind the seal which runs around the metal body work. With the roof up the membrane is not visible so did not need trimming.
Removing the rear of the screen takes about 15 mins with a 10 mm socket and a little longer to refit. The rain is coming so will find out if this is successful.
Last edited by MrGrey on Tue May 21, 2013 2:42 pm, edited 1 time in total.

Post Reply

Return to “MX5 Discussion”

Who is online

Users browsing this forum: No registered users and 26 guests