From the ashes... What did you do to your roadster today?
Moderators: LilRay.Sun, Furai, Growler, zorruno, jif
-
marcellarius
- I count 5-s in my sleep

- Posts: 367
- Joined: Thu Apr 18, 2013 12:52 pm
- Location: Hamiltron
-
marcellarius
- I count 5-s in my sleep
- Posts: 367
- Joined: Thu Apr 18, 2013 12:52 pm
- Location: Hamiltron
-
Snapfrozen
- I am quitting my job and going 5-ing

- Posts: 747
- Joined: Sun Jun 24, 2012 11:58 am
Thanks very much for your help. I've been told that the black, blue wire is charcoal canister, is it possible I've got the 2 wires there (Same plug colour/shape) mixed upmarcellarius wrote:The Blue/Black connector is for the ignition capacitor -- small 1 inch-ish black box with two wires coming out of it. Attaches to the igniter bracket.
-
marcellarius
- I count 5-s in my sleep
- Posts: 367
- Joined: Thu Apr 18, 2013 12:52 pm
- Location: Hamiltron

-
Snapfrozen
- I am quitting my job and going 5-ing
- Posts: 747
- Joined: Sun Jun 24, 2012 11:58 am
-
Jesse Pinkman
- Tentative sideways sliding....

- Posts: 49
- Joined: Wed May 14, 2014 2:54 pm
- Location: Auckland
Head gasket
Bought this little turd a month or two ago, I knew it had a blown head gasket or a cracked head so last week I changed the head gasket. The radiator wasn't pressurising after this but it was still billowing smoke out like a mo fo... So at least I fixed one thing! :/ Put a third of a bottle of that CRC Fibrelock in the radiator, and 45min of idling later she is no longer puffing out white smoke!! Going really good now, next on the to do list is get a new set of wheels and weld up a roll bar / half cage for track days! 
- Attachments
-
-
-
Don’t confuse fame with success. Madonna is one; Helen Keller is the other.
-
Snapfrozen
- I am quitting my job and going 5-ing
- Posts: 747
- Joined: Sun Jun 24, 2012 11:58 am
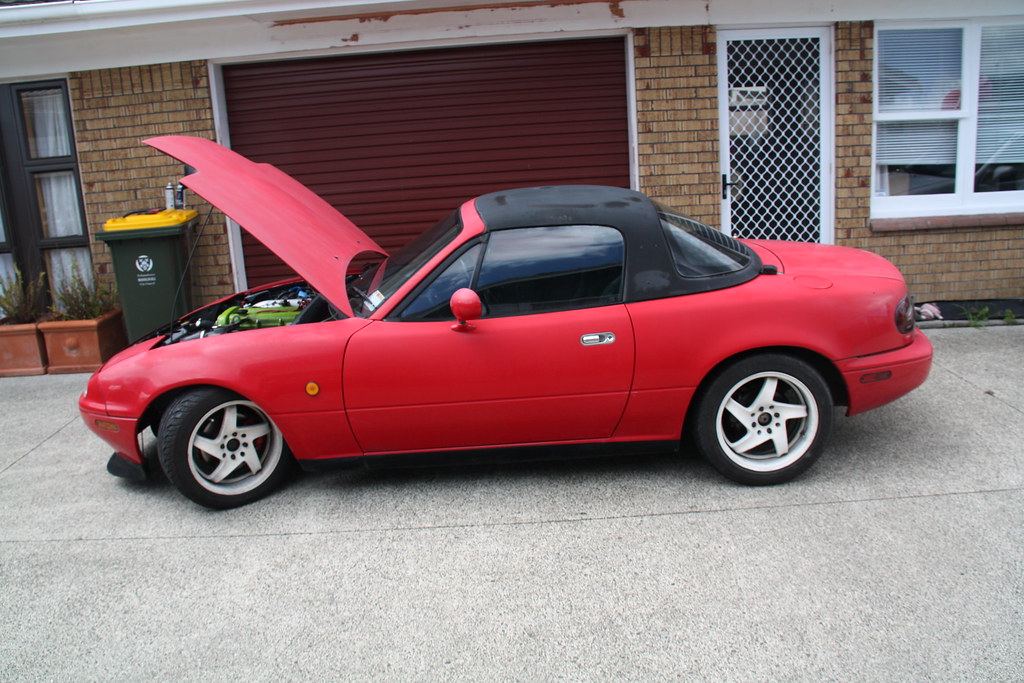
Well ain't this long overdue...
Decided the rusty poo bit of metal on the back of the bumper was too yuck so cleaned that up and threw some black on her. I'm long overdue to get some decent photos up of the car but that will happen soon enough.
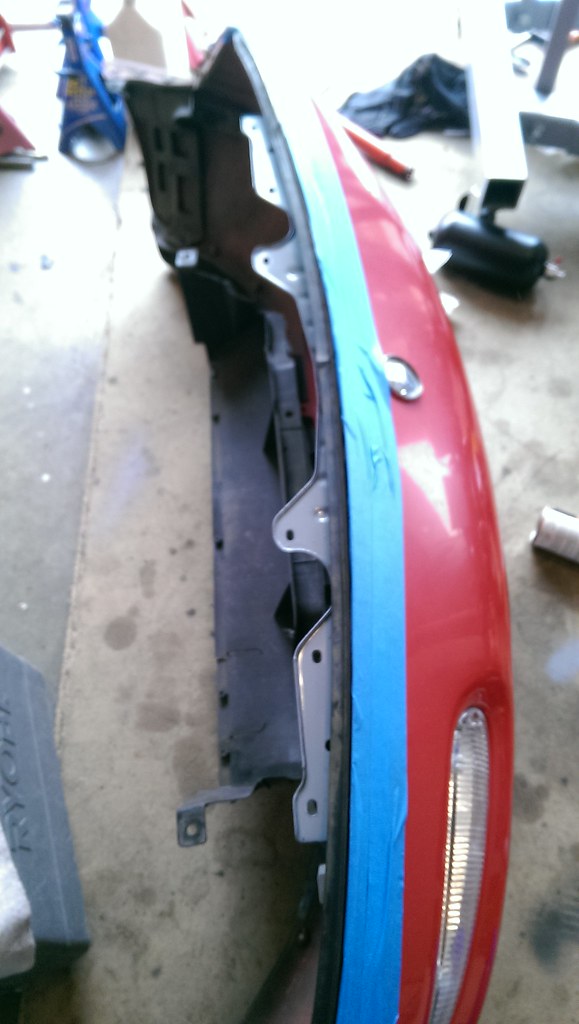 IMAG1007 by Jarred McLachlan, on Flickr
So where to start? I have sorted all of the plugs, some confusion arose around the earth on the back of the intake manifold and which plug this was, sorted quite quickly luckily but I was actually missing the bracket on this manifold so unsure how the loom was laid out before.
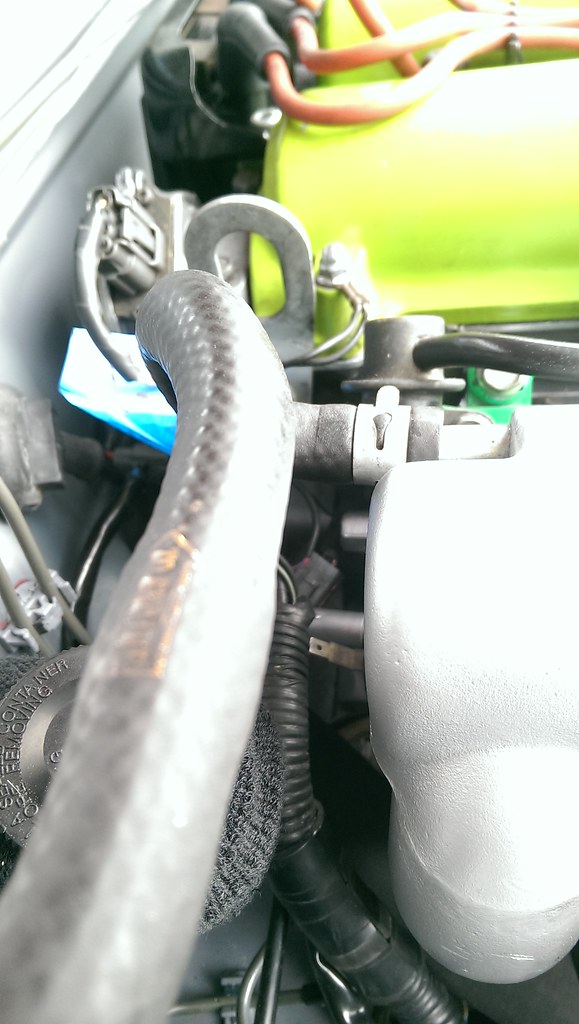 IMAG1008 by Jarred McLachlan, on Flickr
Found this but it's only the temp sensor, some heat shrink and solder solved that.
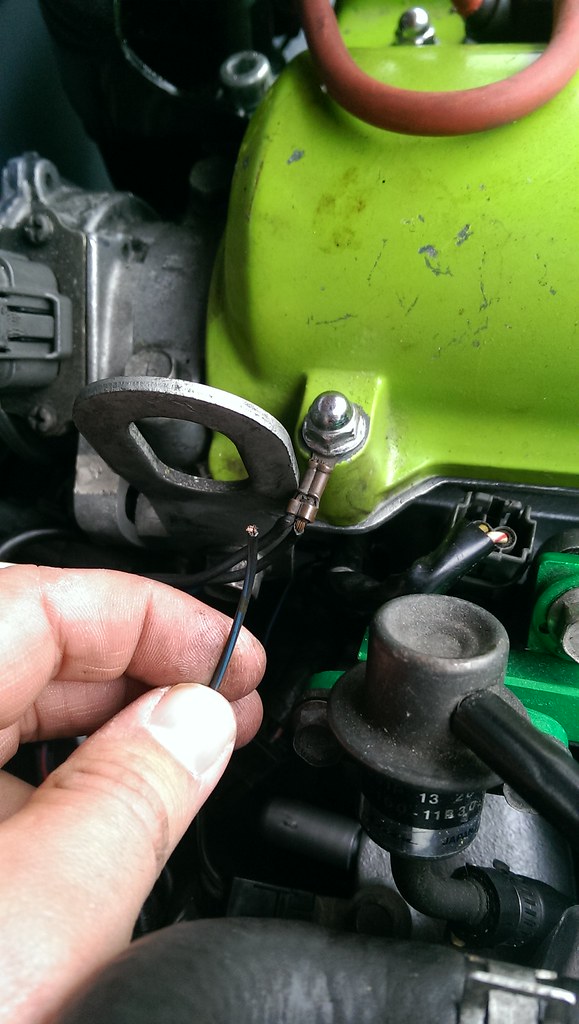 IMAG1065 by Jarred McLachlan, on Flickr
I had reached the point I'd tested spark and leads and both were fine, had also tested fuel and also was seeing it at the hard lines so all that was left was timing, vacuum or injectors. I knew the injectors were OK as they'd been tested so assumed my wiring was out. Voltmeter told me it wasn't so went back a step.
Changed plugs for the correct temp range. Had 2x BKR5's and 2x BKR6's. Rando.
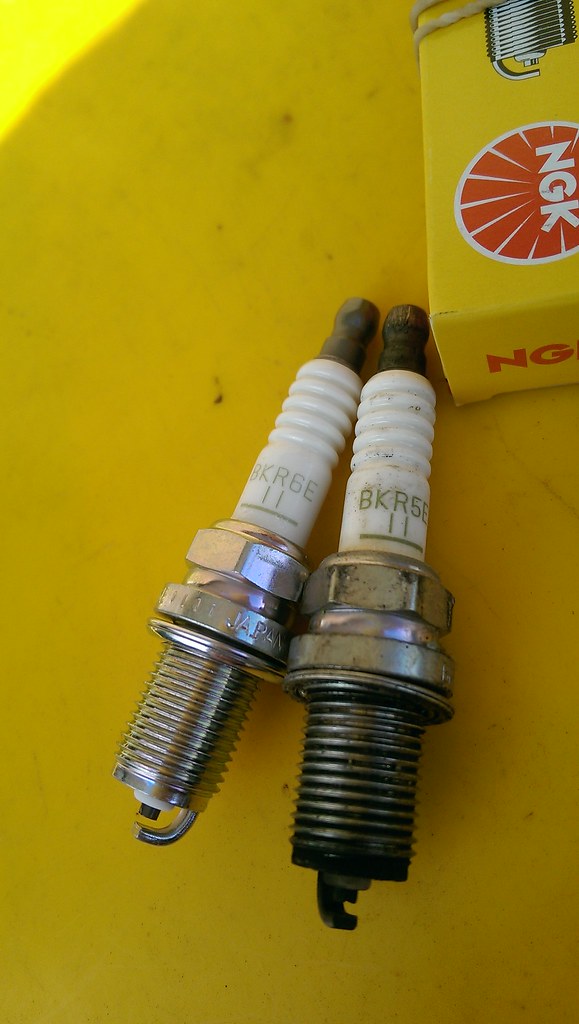 IMAG1064 by Jarred McLachlan, on Flickr
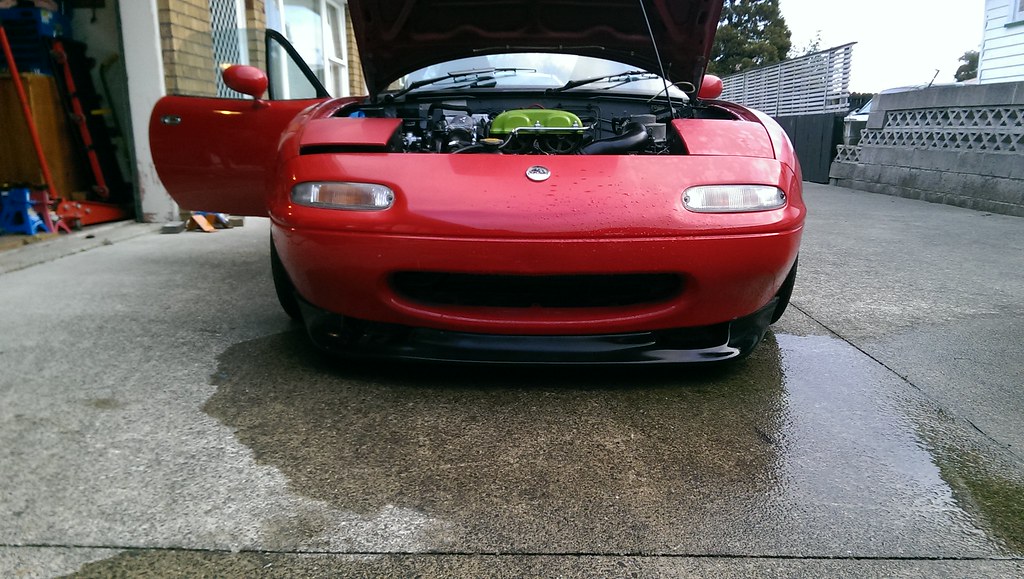
All of the OCD has been worth it when I look at shots like this...
 IMAG1015 by Jarred McLachlan, on Flickr
 IMAG1014 by Jarred McLachlan, on Flickr
Now if you would be so kind as to click below with your sound on.
https://www.youtube.com/watch?v=LThLD51 ... e=youtu.be
I'd got the old bitch firing last night but had a major fuel leak thanks to these.
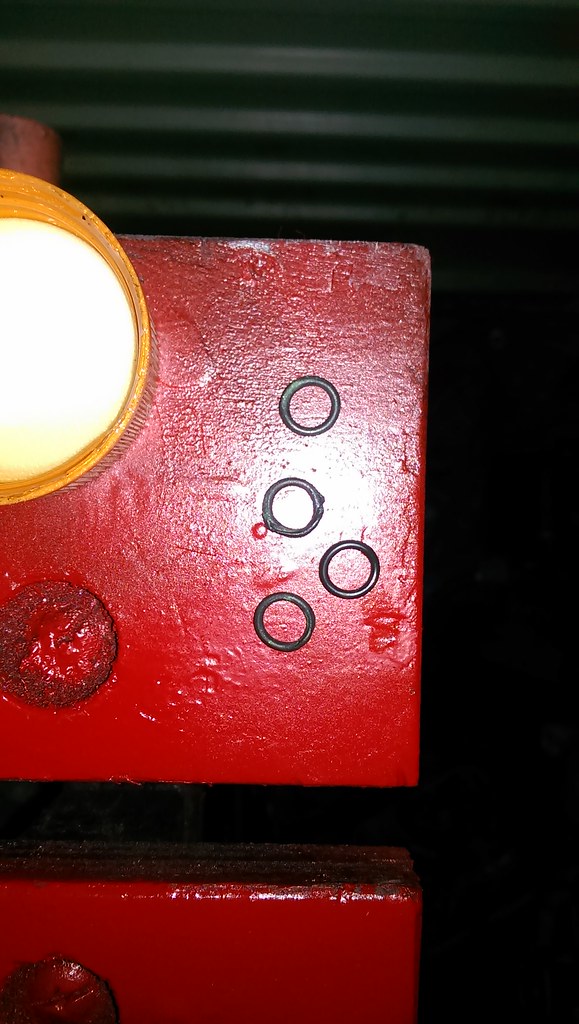 IMAG1070 by Jarred McLachlan, on Flickr
Replaced and away laughing. Anyone who's been talking to me recently knows how stumped I was as to why the car didn't start. Basically the bracket that holds the hard lines to the chassis had been flipped 180 when I put it back on after painting so my return and feed were backwards. I had undone this to test them and did it back up after the same way so it appeared I had fuel, but I was running it backwards through the rail.
Now simply to bleed the brakes, clutch, align the clutch pin to master cylinder, gearbox oil, alignment and WoF/Registration...
Decided the rusty poo bit of metal on the back of the bumper was too yuck so cleaned that up and threw some black on her. I'm long overdue to get some decent photos up of the car but that will happen soon enough.
IMAG1007 by Jarred McLachlan, on FlickrSo where to start? I have sorted all of the plugs, some confusion arose around the earth on the back of the intake manifold and which plug this was, sorted quite quickly luckily but I was actually missing the bracket on this manifold so unsure how the loom was laid out before.
IMAG1008 by Jarred McLachlan, on FlickrFound this but it's only the temp sensor, some heat shrink and solder solved that.
IMAG1065 by Jarred McLachlan, on FlickrI had reached the point I'd tested spark and leads and both were fine, had also tested fuel and also was seeing it at the hard lines so all that was left was timing, vacuum or injectors. I knew the injectors were OK as they'd been tested so assumed my wiring was out. Voltmeter told me it wasn't so went back a step.
Changed plugs for the correct temp range. Had 2x BKR5's and 2x BKR6's. Rando.
IMAG1064 by Jarred McLachlan, on FlickrAll of the OCD has been worth it when I look at shots like this...
IMAG1015 by Jarred McLachlan, on FlickrIMAG1014 by Jarred McLachlan, on FlickrNow if you would be so kind as to click below with your sound on.
https://www.youtube.com/watch?v=LThLD51 ... e=youtu.be
I'd got the old bitch firing last night but had a major fuel leak thanks to these.
IMAG1070 by Jarred McLachlan, on FlickrReplaced and away laughing. Anyone who's been talking to me recently knows how stumped I was as to why the car didn't start. Basically the bracket that holds the hard lines to the chassis had been flipped 180 when I put it back on after painting so my return and feed were backwards. I had undone this to test them and did it back up after the same way so it appeared I had fuel, but I was running it backwards through the rail.
Now simply to bleed the brakes, clutch, align the clutch pin to master cylinder, gearbox oil, alignment and WoF/Registration...
If you are at Ruapuna for the Endurance weekend, say hi..MX4000 wrote:Drove the new V8 for the first time - just around the block. Basically transferred the running gear from my rough silver NA into a tidy V Spec NA. In theory cheaper than a paint job but a long job. Just need a wheel alignment then certifying... . Love that lack of traction!
Ian
93 1.8,intake/ex mods,Megasqirt PNP,torsen ,konis,GC coilovers,Nitto-01,cage,sparco seat,Schroth harness.
-
Snapfrozen
- I am quitting my job and going 5-ing
- Posts: 747
- Joined: Sun Jun 24, 2012 11:58 am
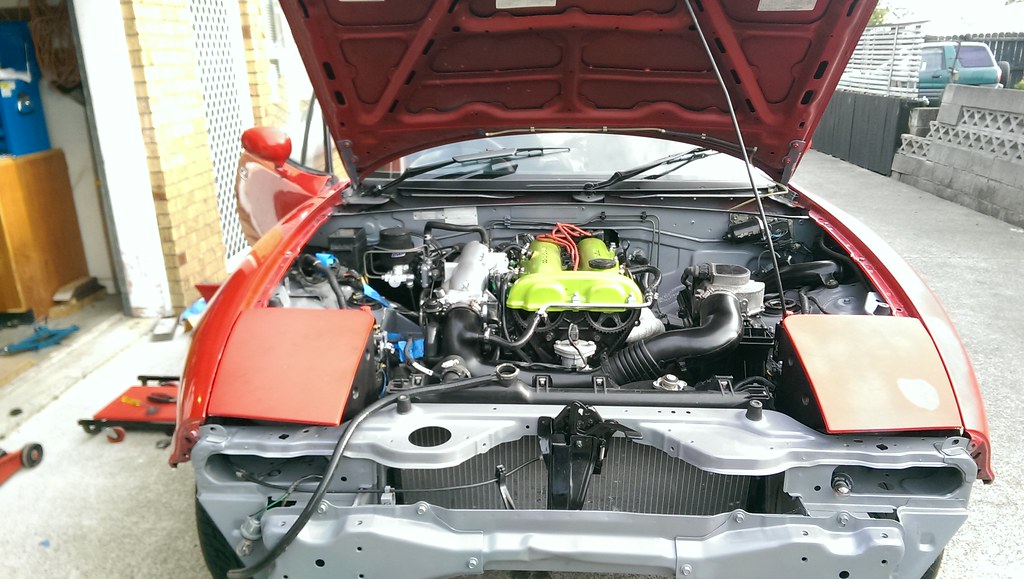
So an update is due... Since my last post I obviously got the car running but had a reasonably long list of little things left to fix. I decided with a week and a half until I visit USA for a month, it was probably a good time to do it.
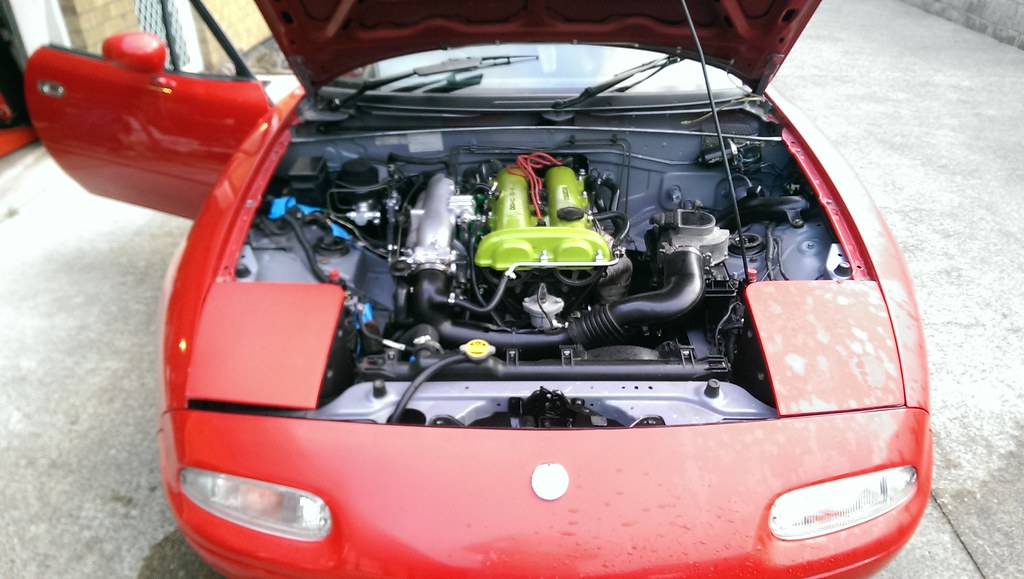
Here she is as she sits now, still got to deal to the loom but it's not a priority
 IMAG1074 by Jarred McLachlan, on Flickr
 IMAG1073 by Jarred McLachlan, on Flickr
 IMAG1071 by Jarred McLachlan, on Flickr
I ran the car for a bit after bleeding the brakes with some of nature's finest as below and noticed a few problems.
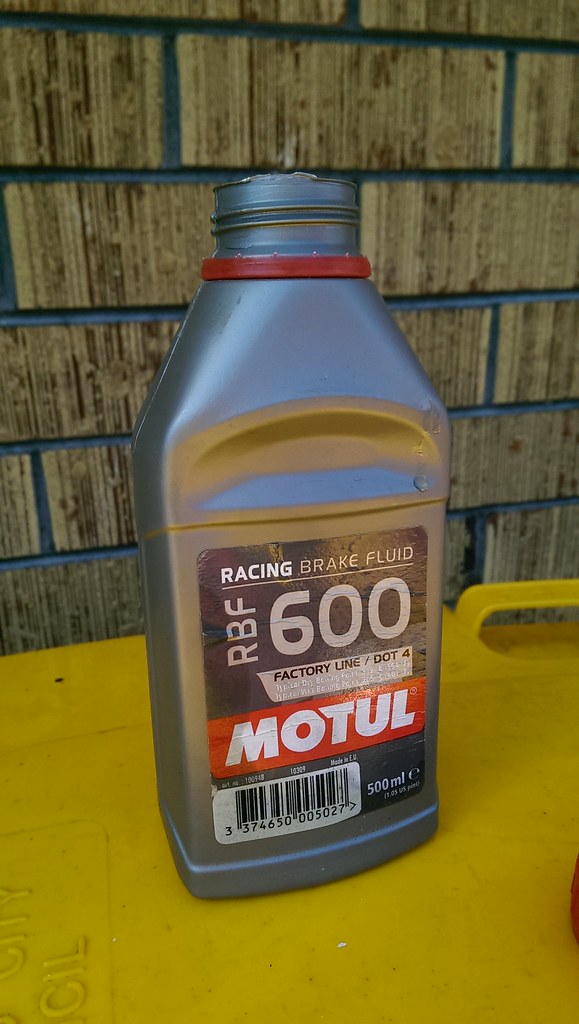 IMAG1094 by Jarred McLachlan, on Flickr
 IMAG1093 by Jarred McLachlan, on Flickr
 IMAG1091 by Jarred McLachlan, on Flickr
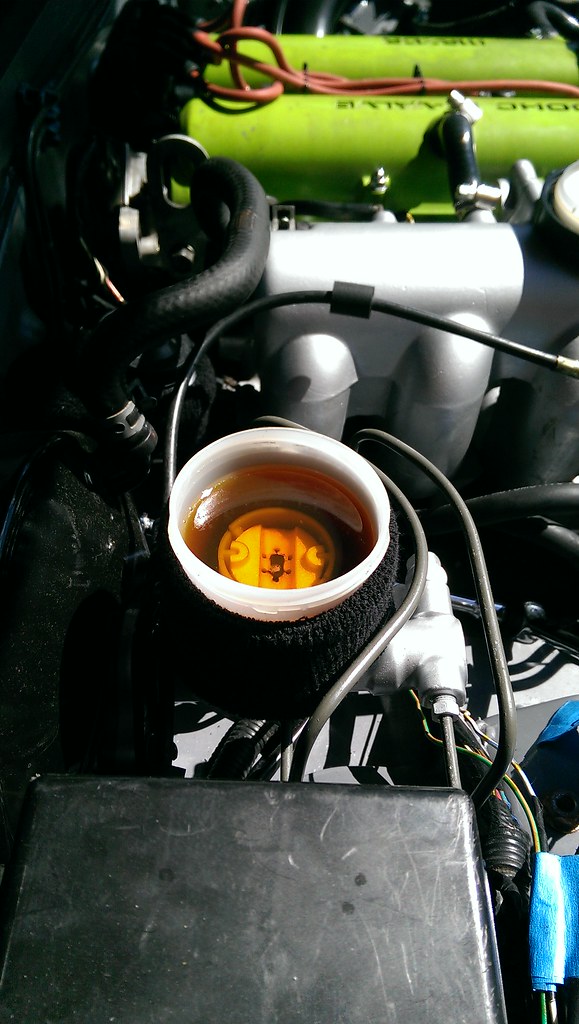
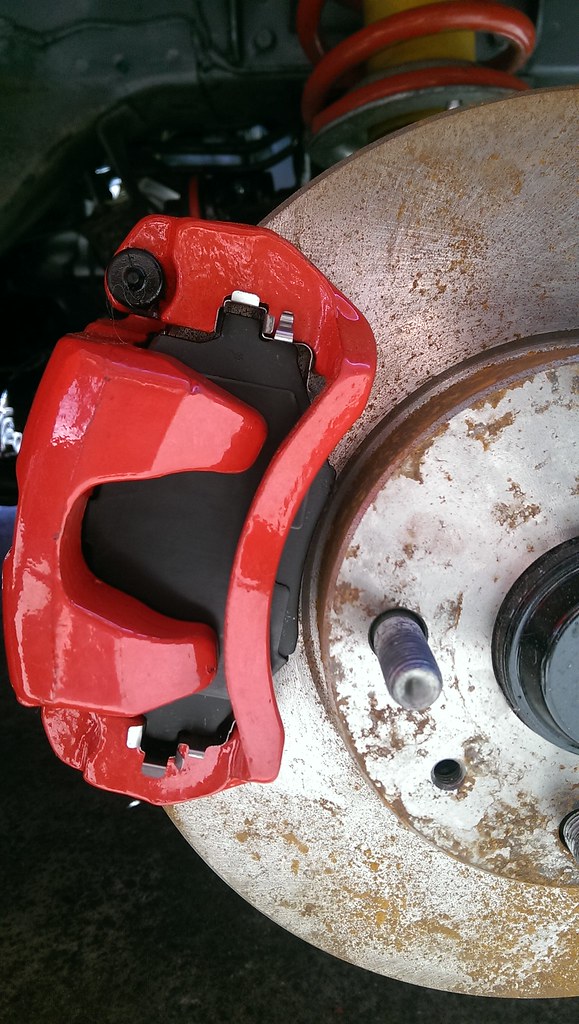
1. After bleeding all corners I had to pump the pedal 4 or so times to get the brakes to come up. Assumed either there was an airlock somewhere or my rear calipers were poops. Luckily the handbrake still functioned so it just confirmed that I did a poos job so after re-bleeding them, we were away.
2. While running the car, I noticed a leak. Unfortunately the sensor in the front "ex-thermostat housing" had sprung a leak. So some fresh RTV and an oring sorted that.
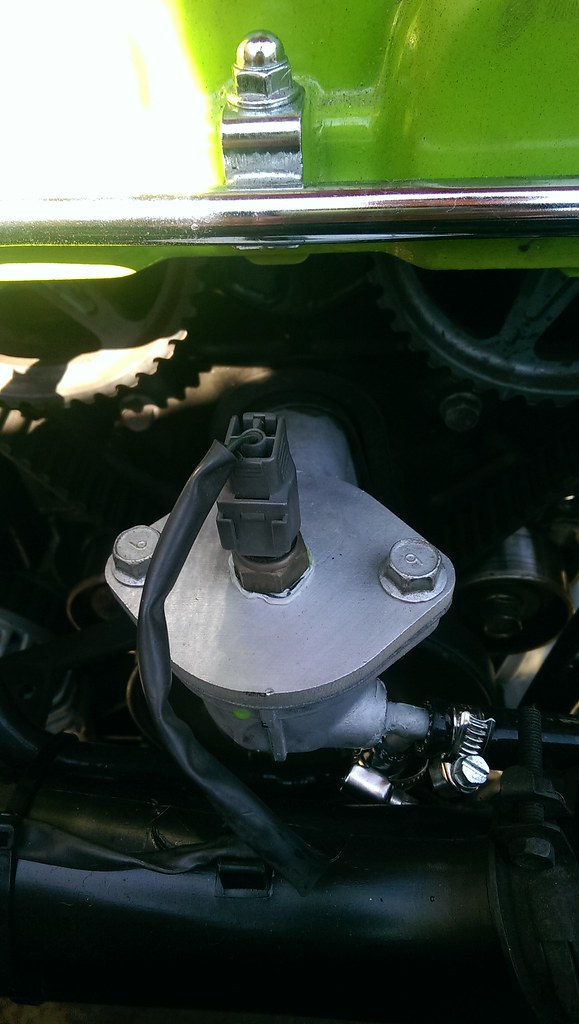 IMAG1092 by Jarred McLachlan, on Flickr
My wiper blades we'rent working which is a problem in NZ weather so after the Mrs diagnosed that "They black bit at the bottom isn't fucking attached" was the problem, I set about finding the right nut for the job.
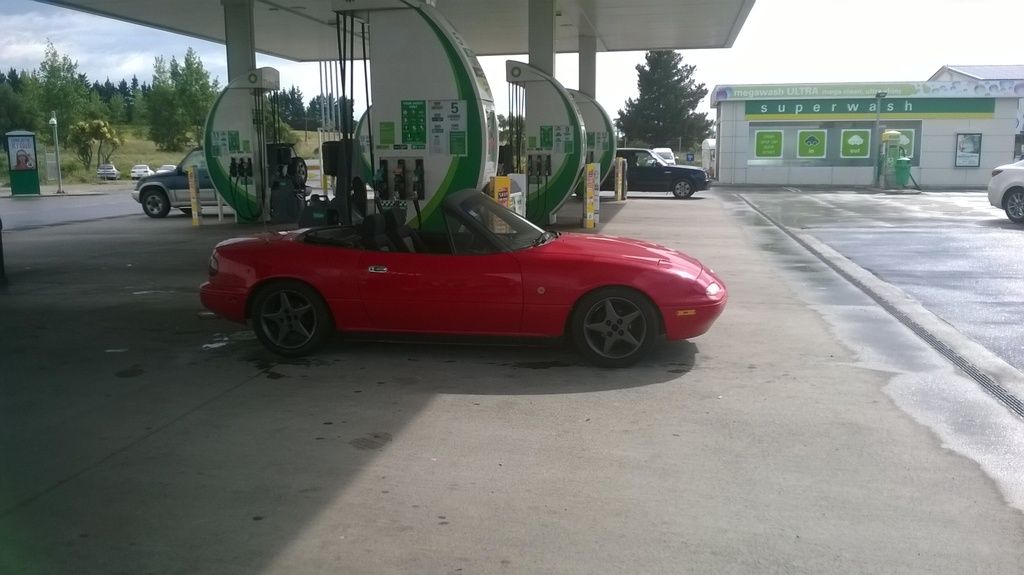
With this is mind I had a crazy idea. Why don't I go and gas her up? Then this happened.
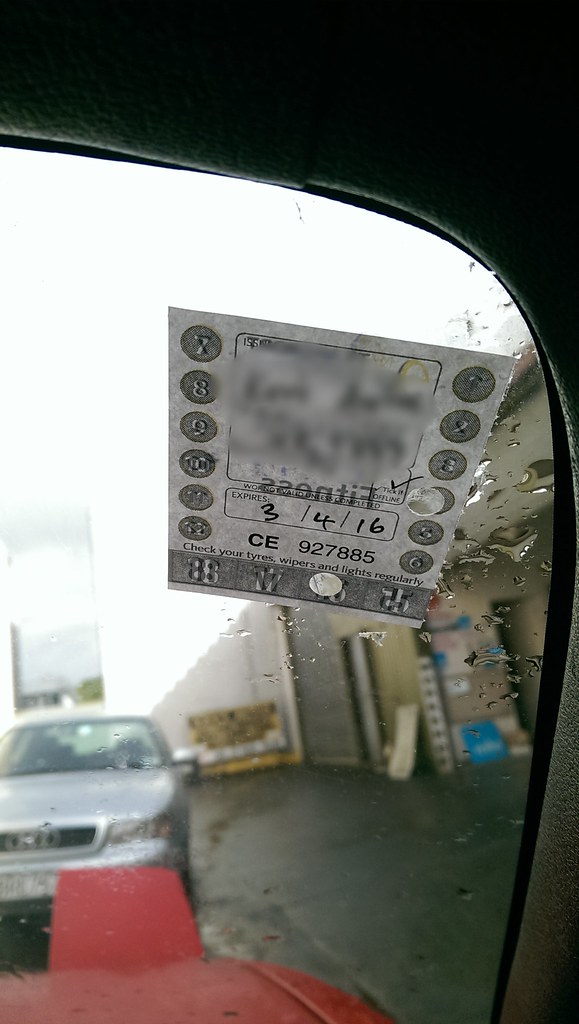 IMAG1098 by Jarred McLachlan, on Flickr
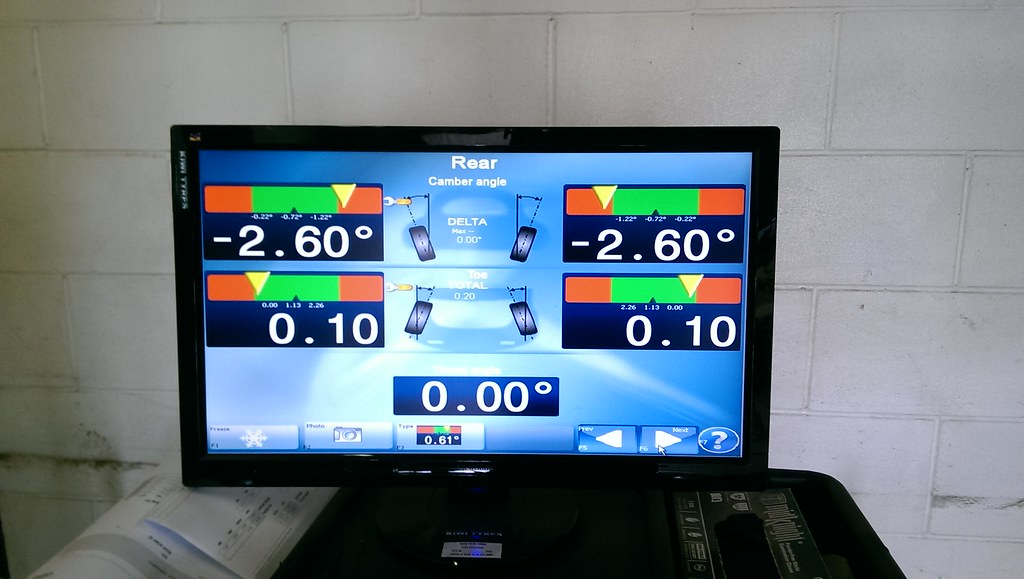
At this point I was on a high so *Shameless plug* I went to see Todd at Kiwi Tyres who gave me an OCD alignment exactly as I wanted. It turns out that my original eye-lignment was just plain shit.
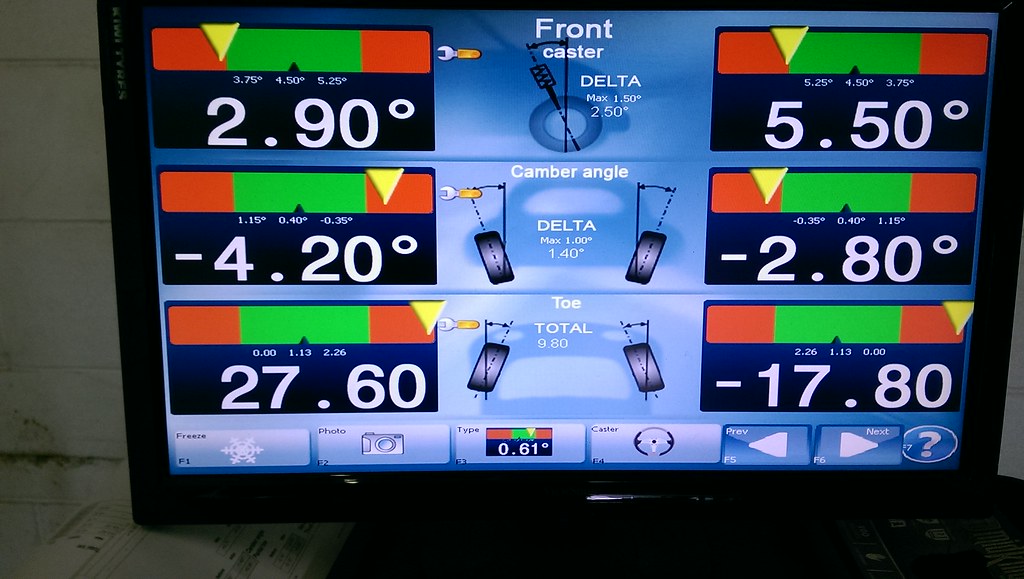 IMAG1103 by Jarred McLachlan, on Flickr
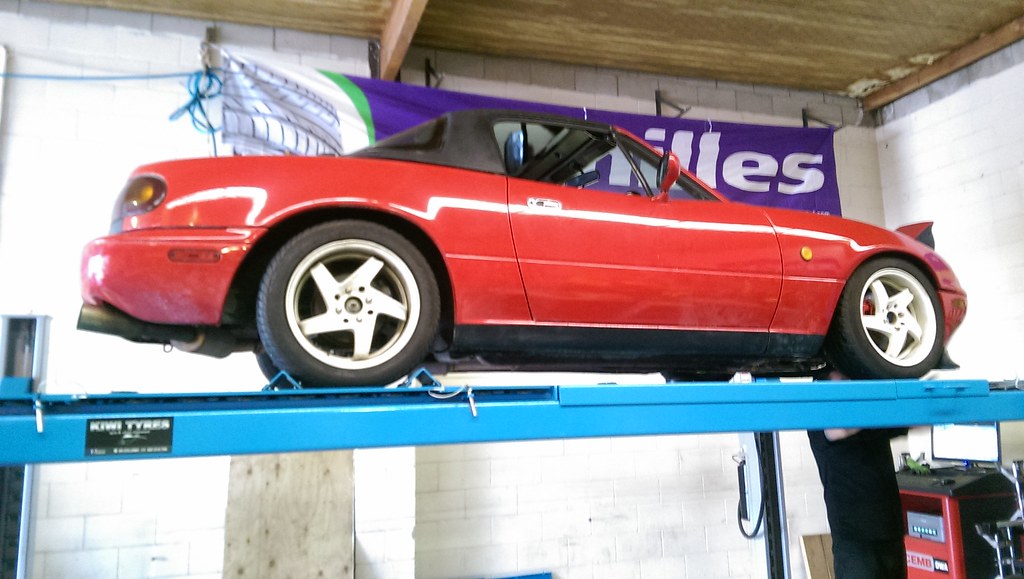
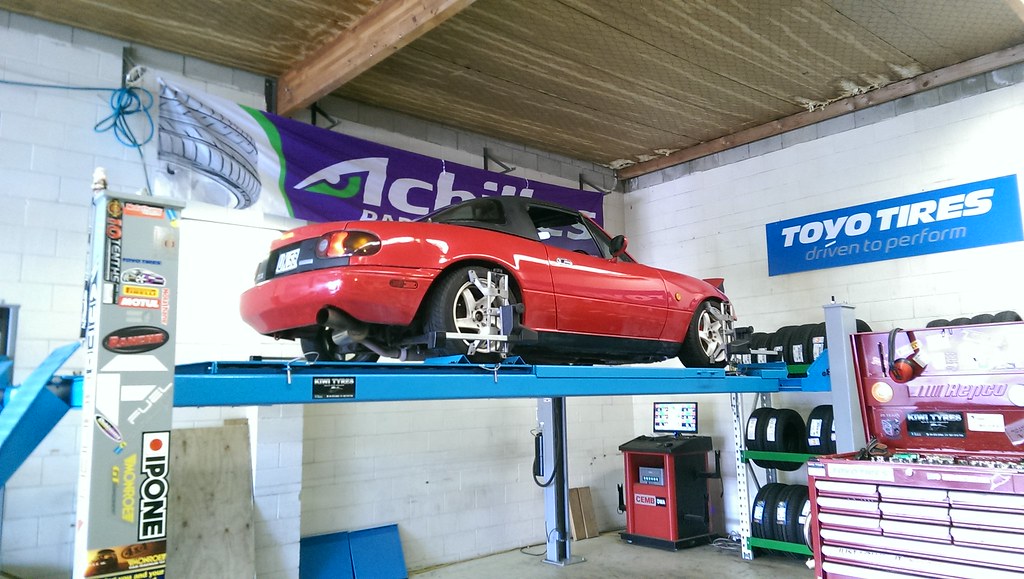
And here's the end result
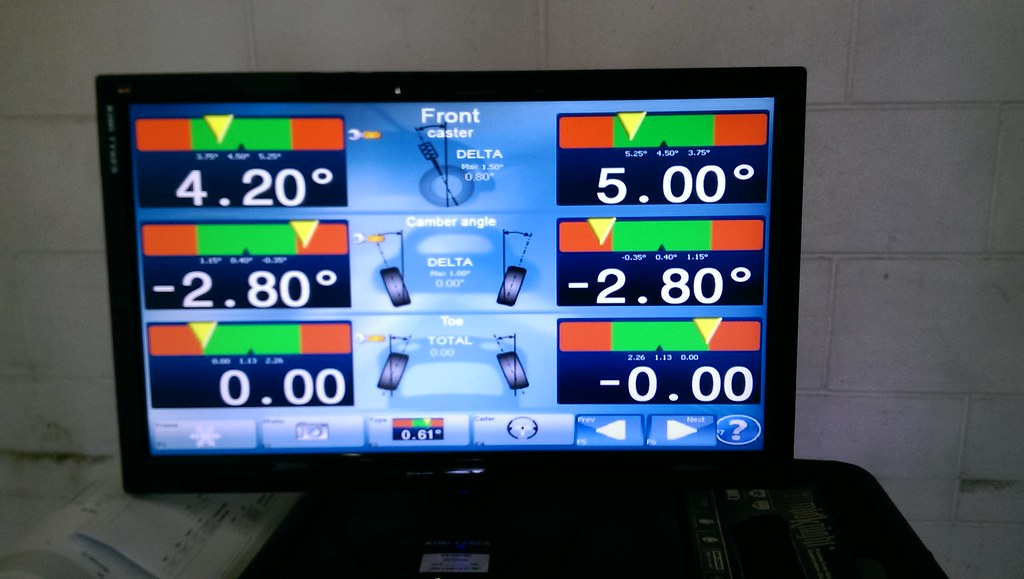 IMAG1104 by Jarred McLachlan, on Flickr
 IMAG1102 by Jarred McLachlan, on Flickr
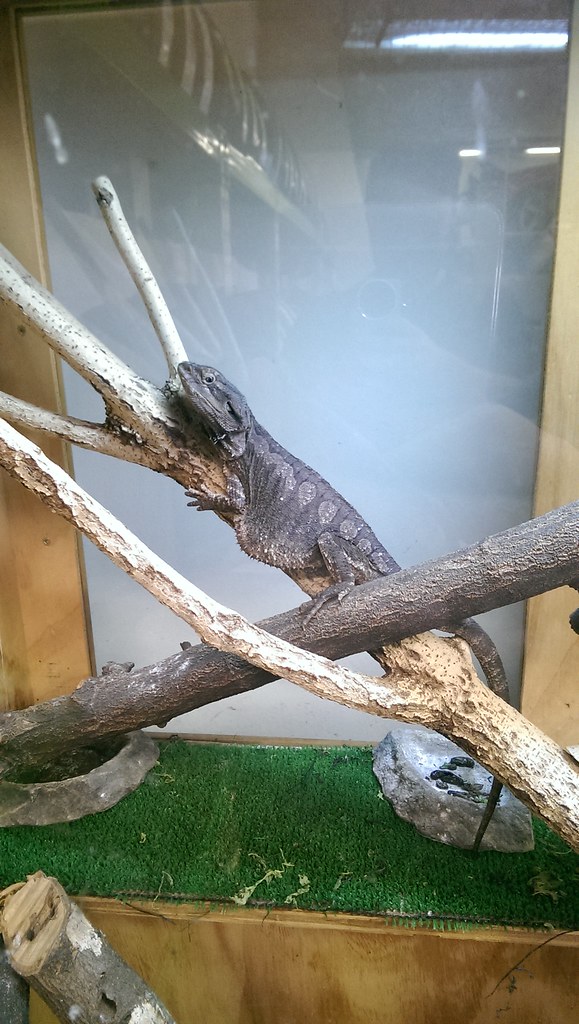
Awesome work from a top chap. He also sold me some fancy new spline nuts to replace my shitty old rusty ones. And he has a choice lizard.
 IMAG1106 by Jarred McLachlan, on Flickr
 IMAG1099 by Jarred McLachlan, on Flickr
 IMAG1105 by Jarred McLachlan, on Flickr
And for the first time in a long time, she's road legal...
Here she is as she sits now, still got to deal to the loom but it's not a priority
IMAG1074 by Jarred McLachlan, on FlickrIMAG1073 by Jarred McLachlan, on FlickrIMAG1071 by Jarred McLachlan, on FlickrI ran the car for a bit after bleeding the brakes with some of nature's finest as below and noticed a few problems.
IMAG1094 by Jarred McLachlan, on FlickrIMAG1093 by Jarred McLachlan, on FlickrIMAG1091 by Jarred McLachlan, on Flickr1. After bleeding all corners I had to pump the pedal 4 or so times to get the brakes to come up. Assumed either there was an airlock somewhere or my rear calipers were poops. Luckily the handbrake still functioned so it just confirmed that I did a poos job so after re-bleeding them, we were away.
2. While running the car, I noticed a leak. Unfortunately the sensor in the front "ex-thermostat housing" had sprung a leak. So some fresh RTV and an oring sorted that.
IMAG1092 by Jarred McLachlan, on FlickrMy wiper blades we'rent working which is a problem in NZ weather so after the Mrs diagnosed that "They black bit at the bottom isn't fucking attached" was the problem, I set about finding the right nut for the job.
With this is mind I had a crazy idea. Why don't I go and gas her up? Then this happened.
IMAG1098 by Jarred McLachlan, on FlickrAt this point I was on a high so *Shameless plug* I went to see Todd at Kiwi Tyres who gave me an OCD alignment exactly as I wanted. It turns out that my original eye-lignment was just plain shit.
IMAG1103 by Jarred McLachlan, on FlickrAnd here's the end result
IMAG1104 by Jarred McLachlan, on FlickrIMAG1102 by Jarred McLachlan, on FlickrAwesome work from a top chap. He also sold me some fancy new spline nuts to replace my shitty old rusty ones. And he has a choice lizard.
IMAG1106 by Jarred McLachlan, on FlickrIMAG1099 by Jarred McLachlan, on FlickrIMAG1105 by Jarred McLachlan, on FlickrAnd for the first time in a long time, she's road legal...
Gave my car its annual outing around Ruapuna in the SIERDC 1 hour race on Saturday. Neil Foster from Auckland in a Audi R8 LMS Ultra won, and perhaps unsurprisingly I was beaten by a flock of Porsche GT3 Cup cars, a Ferrari 458 Challenge not to mention a couple of Corvettes! Great fun racing with exotica.... 
93 1.8,intake/ex mods,Megasqirt PNP,torsen ,konis,GC coilovers,Nitto-01,cage,sparco seat,Schroth harness.
-
Furai
- I have stars, you haven't. Deal with it

- Posts: 1394
- Joined: Tue Feb 14, 2012 5:57 pm
- Location: New Zealand
Went for my first hillclimb today, was awesome fun. Had never been out this way or on this road but was great. A few close moments but came away unscathed.
https://www.youtube.com/watch?v=wolsan9NpN4
https://www.youtube.com/watch?v=wolsan9NpN4
-
Stevo
- I have stars and not afraid to use them
- Posts: 260
- Joined: Sat Jun 10, 2006 7:27 am
- Location: Tauranga
Good vid FuraiFurai wrote:Went for my first hillclimb today, was awesome fun. Had never been out this way or on this road but was great. A few close moments but came away unscathed.
https://www.youtube.com/watch?v=wolsan9NpN4
Run no.3 looked very smooth and quick.
98 NB Evolution Orange


-
biff
- I have stars and not afraid to use them
- Posts: 248
- Joined: Tue May 23, 2006 3:17 pm
- Location: Christchurch
From the ashes... What did you do to your roadster today?
Very nice
I like those!
Biff
-----Original Message-----
From: Junkwhale
Sent: Tuesday, October 20, 2015 10:33 PM
To: mx5talk@mx5forum.co.nz
Subject: [MX5] Re: From the ashes... What did you do to your roadster today?
Test fit of new wheels...
[Image: http://i.imgur.com/1YySJ04.jpg ]
[Image: http://i.imgur.com/Hha7kIz.jpg ]
---
This email has been checked for viruses by Avast antivirus software.
https://www.avast.com/antivirus
[Posted via external email]
Red MX NA
ZOOM1N
ZOOM1N
-
NicF
- Need, more, 5-ing, time....

- Posts: 185
- Joined: Tue Feb 12, 2013 12:00 pm
- Location: Sth Canterbury
Ghetto NA tophat tweak
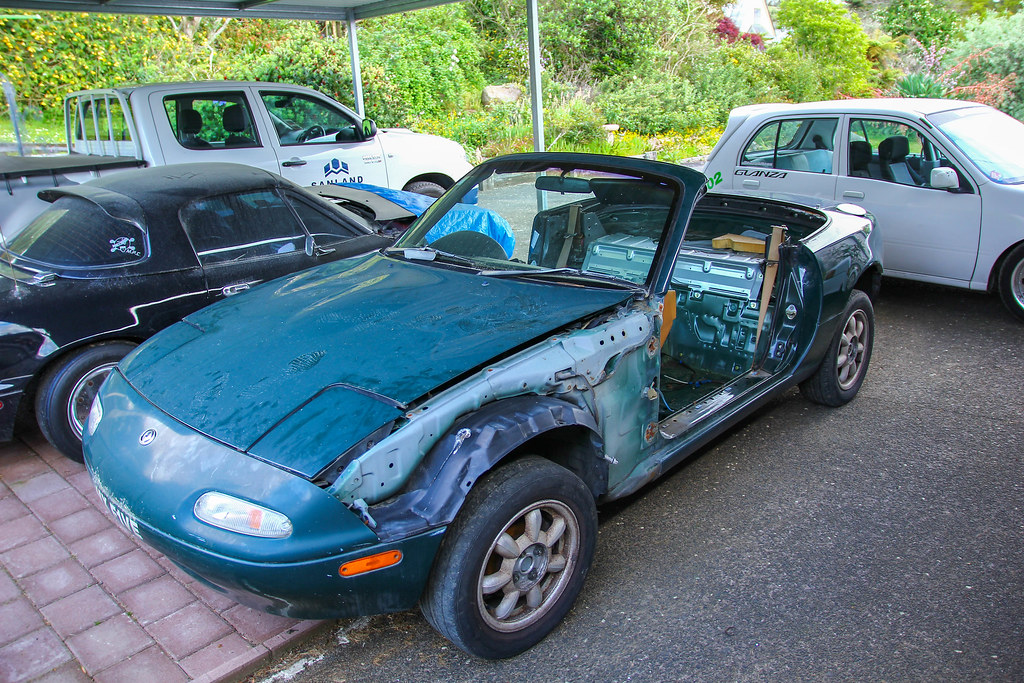
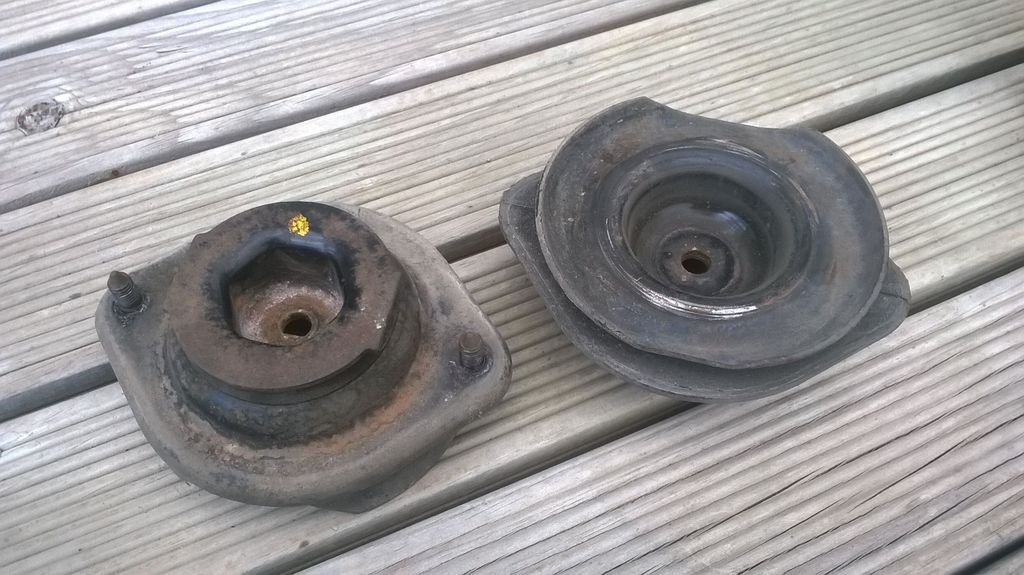
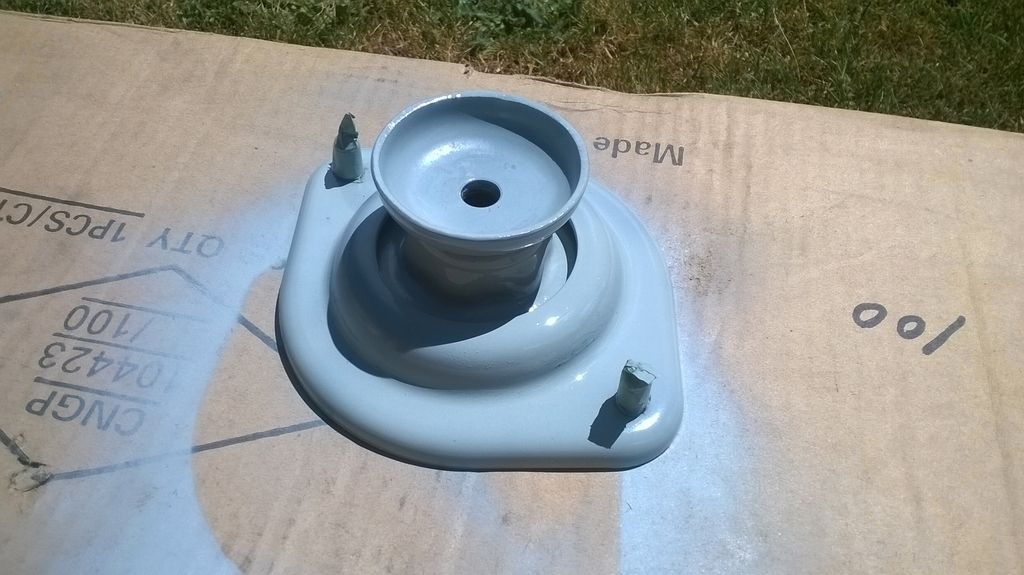
Pulled all the tophats out of my NA and 're-engineered' them for a bit of lowering without losing shock travel.
The mod drops about 25-30mm (still settling so I can't be sure, but that's what the theoretical calcs give me), while lifting the shock mount . No discernable extra NVH, in fact the ride seems better, possibly because the shocks are now operating at a less worn spot.
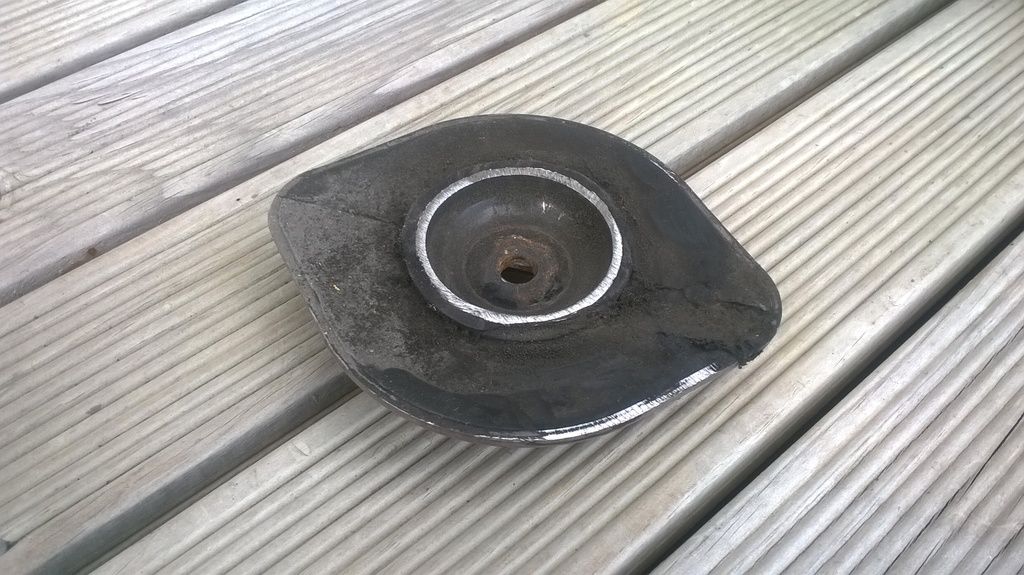
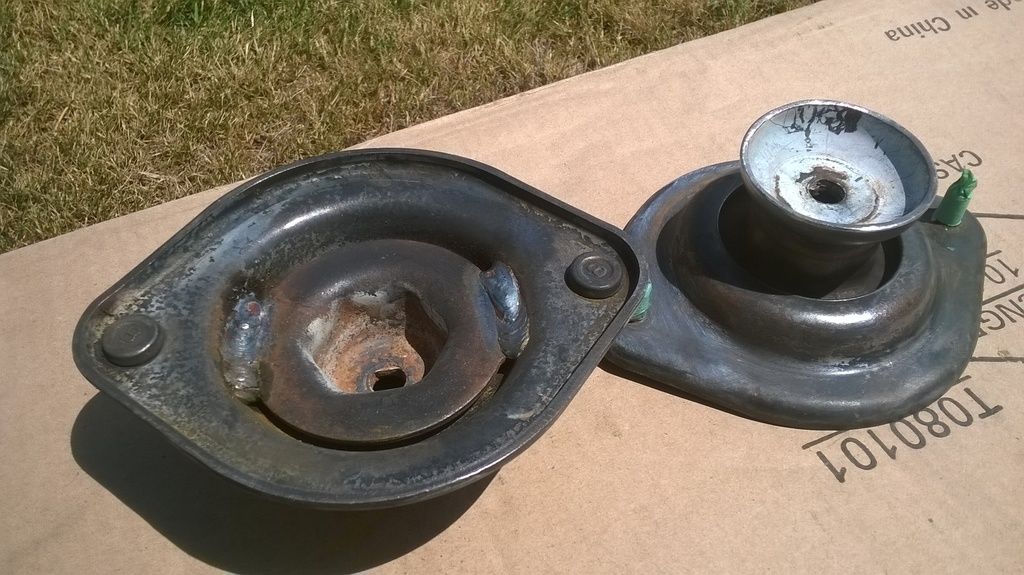
After cutting the old spring seat off, the whole lot was put in the fire to burn out the rubber. Then the shock seat was turned upside down and welded back in.
The bump stops do have to be carved down a bit to fit, sorry no photos of those.
The mod drops about 25-30mm (still settling so I can't be sure, but that's what the theoretical calcs give me), while lifting the shock mount . No discernable extra NVH, in fact the ride seems better, possibly because the shocks are now operating at a less worn spot.
After cutting the old spring seat off, the whole lot was put in the fire to burn out the rubber. Then the shock seat was turned upside down and welded back in.
The bump stops do have to be carved down a bit to fit, sorry no photos of those.


99 NB MX5
91 NA MX5
92 B2600 offroad
Because RWD is ALWAYS more fun
91 NA MX5
92 B2600 offroad
Because RWD is ALWAYS more fun
-
Snapfrozen
- I am quitting my job and going 5-ing
- Posts: 747
- Joined: Sun Jun 24, 2012 11:58 am
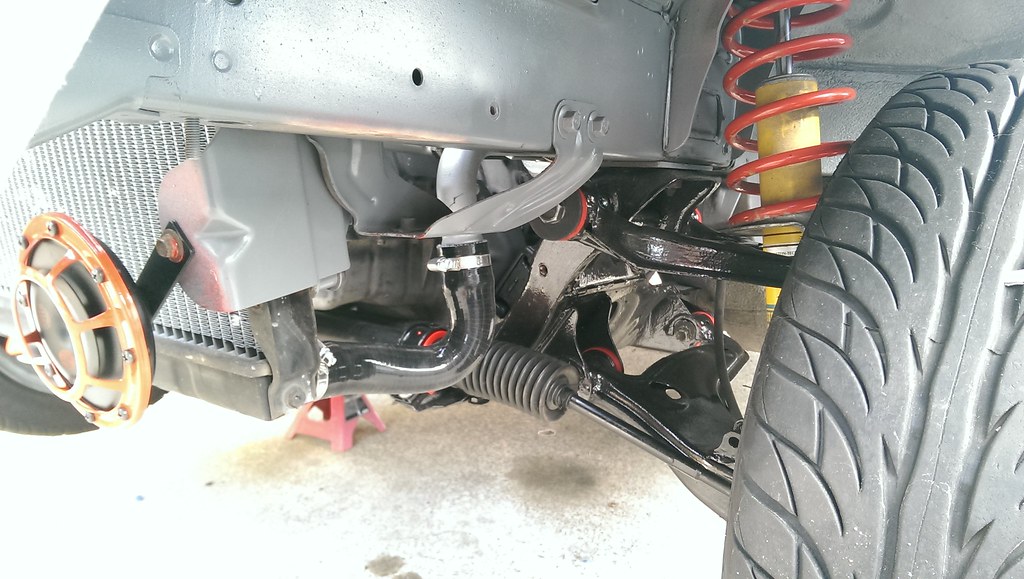
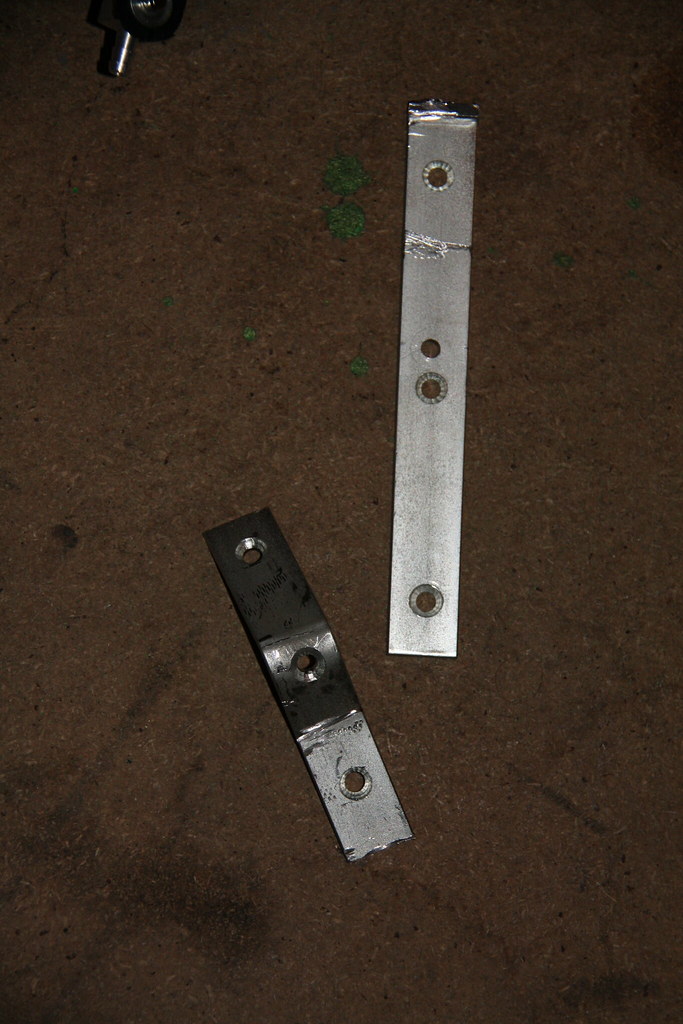
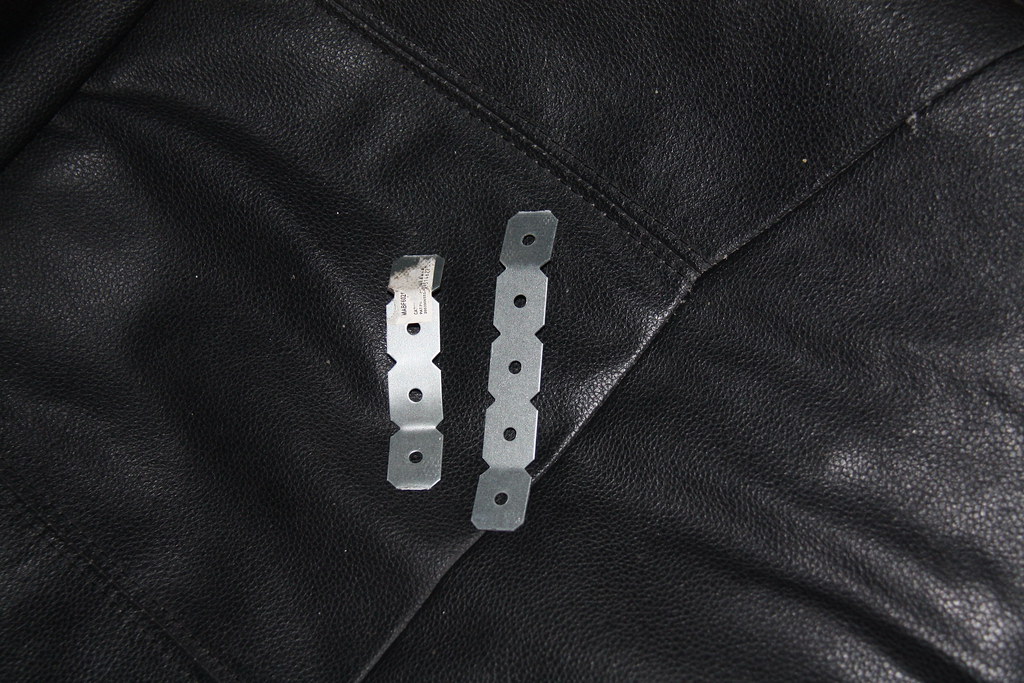
There were a few left over tidbits since I got her road legal and I've really neglected working on her for a while. The upside is the car drives perfectly fine and hasn't skipped a beat. I have been driving the last month or so with no radiator overflow. The factory one is disgustingly huge and sits in the ugliest spot so I have an aftermarket unit from summit to put in. Unfortunately this meant custom mounting it. I started off with a random piece of alloy that I bought from bunnings that looked to be about right. My intention was to bend it into a 90% L shape to mount however once I started working on it I realised that it was far too thick for the job. I haven't really done much fabrication from scratch so this was a pretty good experience working out how thick metal needed to be.
Ended up buying some generic "Make your own" bracket stuff which was perfect. Bent a few up and went to town, works perfect.
The original
 IMG_7308 by Jarred McLachlan, on Flickr
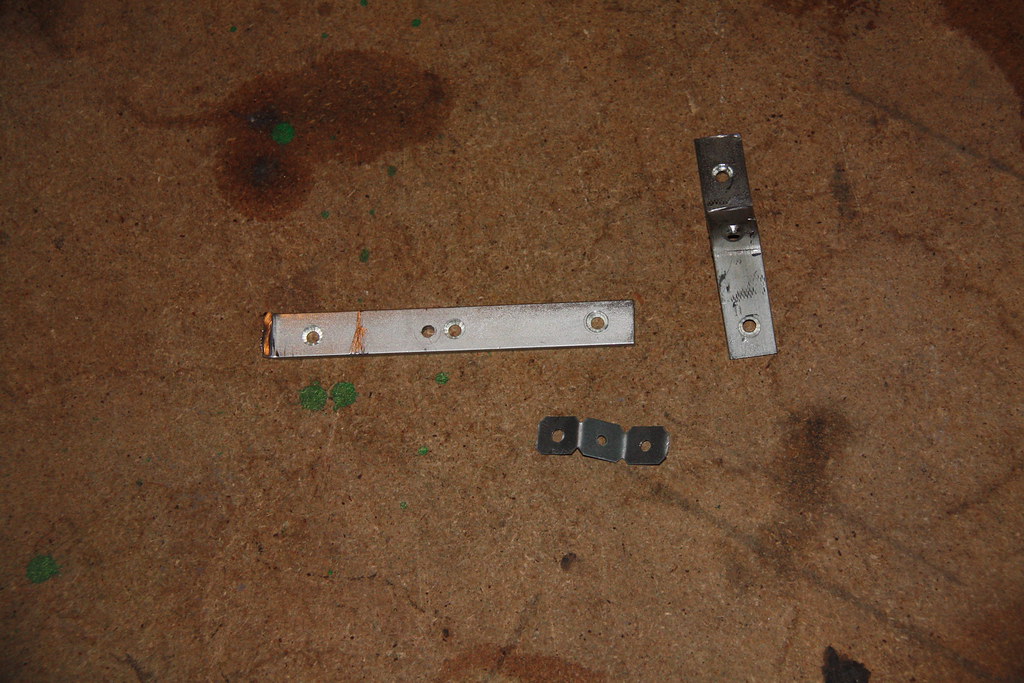
V1,2,3
 IMG_7311 by Jarred McLachlan, on Flickr
Final solution
 IMG_7312 by Jarred McLachlan, on Flickr
Here's where the factory unit goes
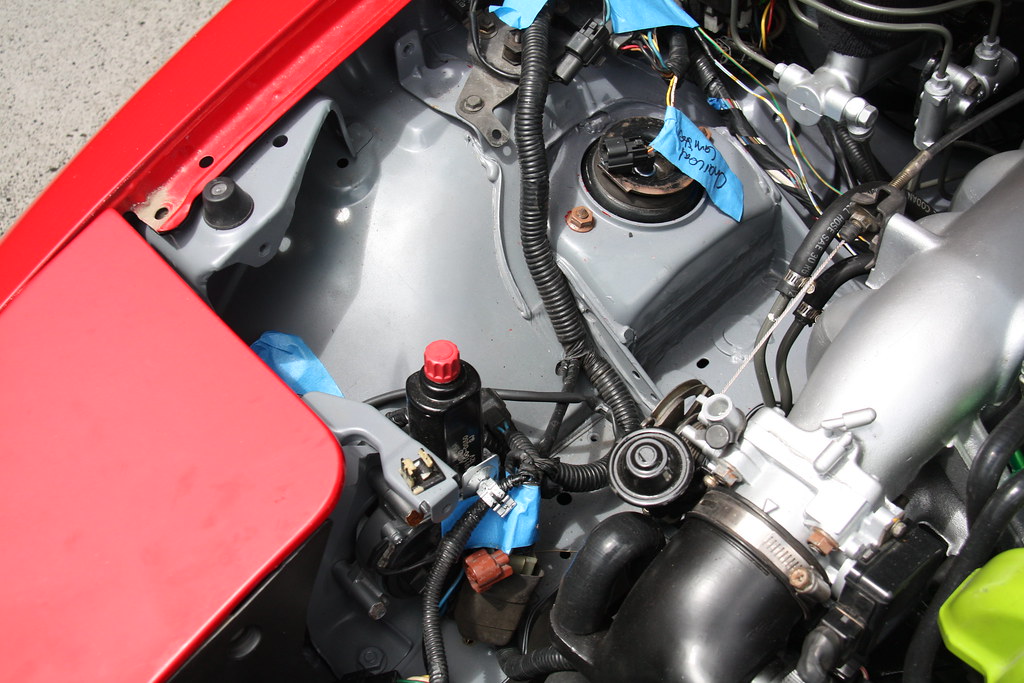 IMG_7313 by Jarred McLachlan, on Flickr
Here's mine.
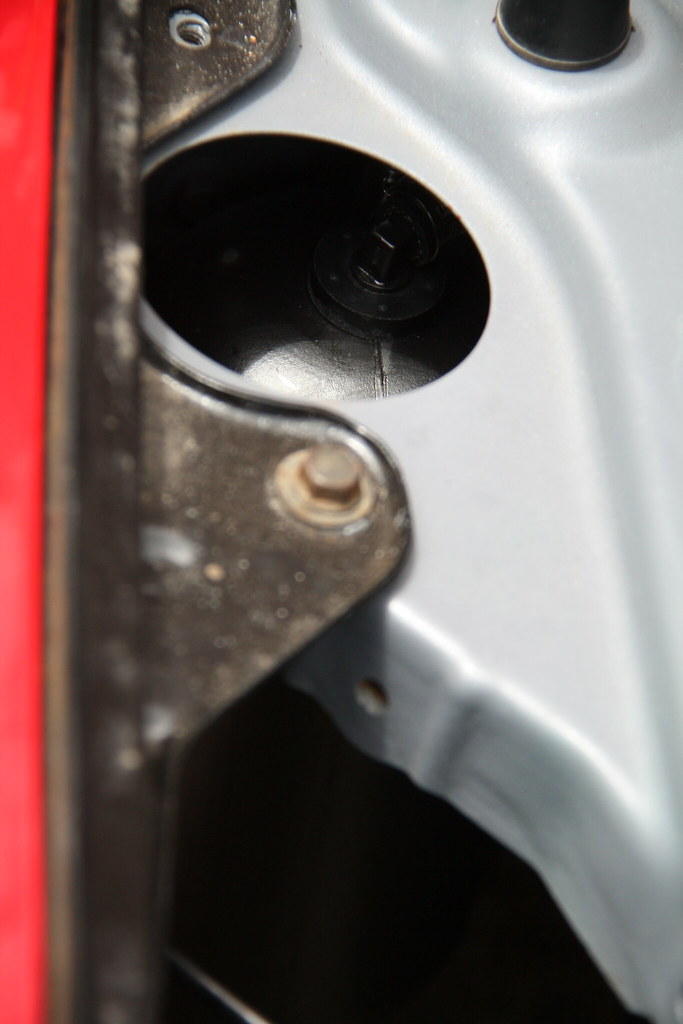 IMG_7315 by Jarred McLachlan, on Flickr
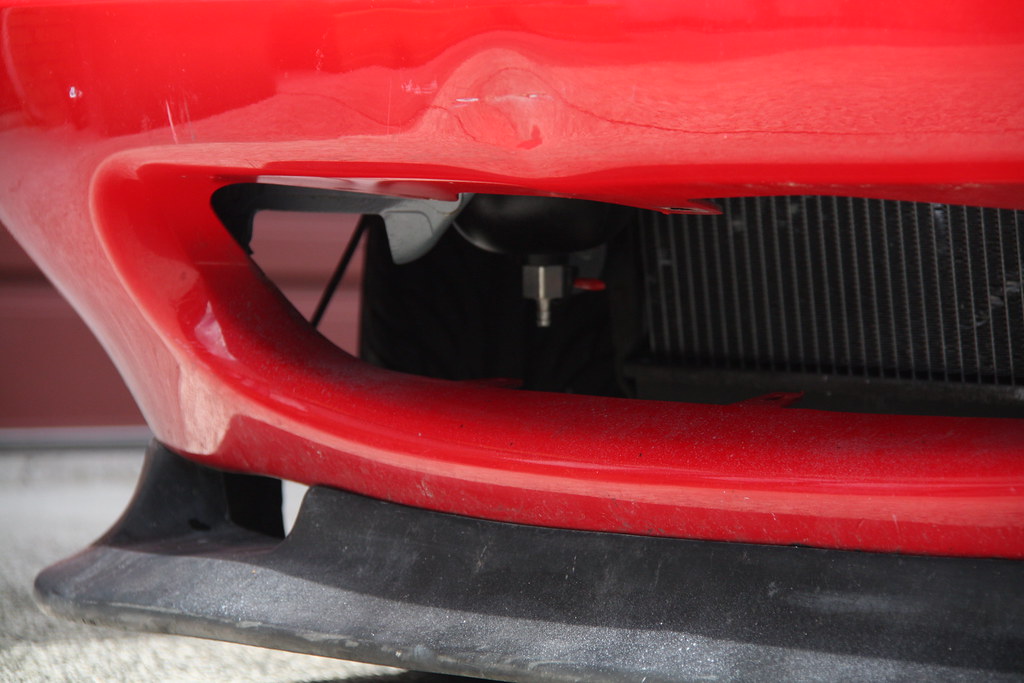 IMG_7314 by Jarred McLachlan, on Flickr
The horn has also stopped working so I'm going to take that opportunity to install my Hella Supertones. Also gave her a clean seeing as 2 years of sun damage had it's way with the paint.
Before:
 IMG_7316 by Jarred McLachlan, on Flickr
After:
 IMG_7319 by Jarred McLachlan, on Flickr
I'm at the point now that I'm a bit unsure where I want to head with the car yet again. Considering the condition I'm thinking my next plans are to wire tuck, roll bar and go back with my original idea of track time and aero. Hard top repaint is lined up for the new year. The current plastidip job has worked perfectly for the 2 years however time for it to be done properly now.
Also realised I neglected to put in a cat photo... I bring you... Hattie the Hutt

Ended up buying some generic "Make your own" bracket stuff which was perfect. Bent a few up and went to town, works perfect.
The original
IMG_7308 by Jarred McLachlan, on FlickrV1,2,3
IMG_7311 by Jarred McLachlan, on FlickrFinal solution
IMG_7312 by Jarred McLachlan, on FlickrHere's where the factory unit goes
IMG_7313 by Jarred McLachlan, on FlickrHere's mine.
IMG_7315 by Jarred McLachlan, on FlickrIMG_7314 by Jarred McLachlan, on FlickrThe horn has also stopped working so I'm going to take that opportunity to install my Hella Supertones. Also gave her a clean seeing as 2 years of sun damage had it's way with the paint.
Before:
IMG_7316 by Jarred McLachlan, on FlickrAfter:
IMG_7319 by Jarred McLachlan, on FlickrI'm at the point now that I'm a bit unsure where I want to head with the car yet again. Considering the condition I'm thinking my next plans are to wire tuck, roll bar and go back with my original idea of track time and aero. Hard top repaint is lined up for the new year. The current plastidip job has worked perfectly for the 2 years however time for it to be done properly now.
Also realised I neglected to put in a cat photo... I bring you... Hattie the Hutt

-
biff
- I have stars and not afraid to use them
- Posts: 248
- Joined: Tue May 23, 2006 3:17 pm
- Location: Christchurch
From the ashes... What did you do to your roadster today?
Very nice
Happy New Year to all.
Biff
-----Original Message-----
From: BRM
Sent: Sunday, January 03, 2016 4:43 PM
To: mx5talk@mx5forum.co.nz
Subject: [MX5] Re: From the ashes... What did you do to your roadster today?
[Image:
http://i1187.photobucket.com/albums/z39 ... 192147.jpg
]
(http://s1187.photobucket.com/user/Brett ... 7.jpg.html)
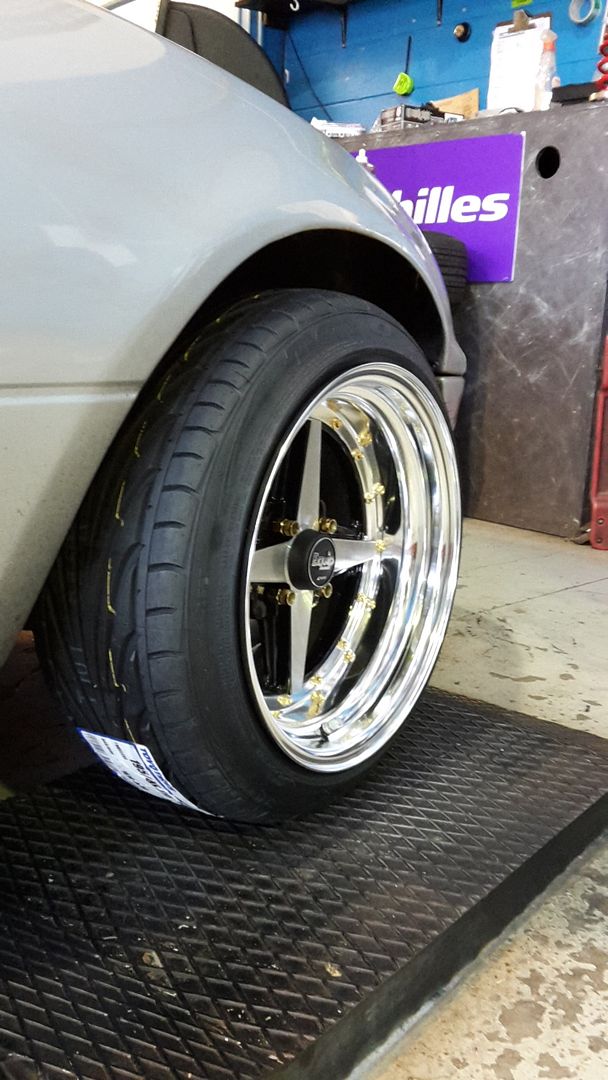
Bought a wheel and a tyre
---
This email has been checked for viruses by Avast antivirus software.
https://www.avast.com/antivirus
[Posted via external email]
Happy New Year to all.
Biff
-----Original Message-----
From: BRM
Sent: Sunday, January 03, 2016 4:43 PM
To: mx5talk@mx5forum.co.nz
Subject: [MX5] Re: From the ashes... What did you do to your roadster today?
[Image:
http://i1187.photobucket.com/albums/z39 ... 192147.jpg
]
(http://s1187.photobucket.com/user/Brett ... 7.jpg.html)
Bought a wheel and a tyre
---
This email has been checked for viruses by Avast antivirus software.
https://www.avast.com/antivirus
[Posted via external email]
Red MX NA
ZOOM1N
ZOOM1N

nc
Just got my 06 RS finished.
Mazdaspeed front and rear bumpers.
Mazdaspeed boot spoiler.
BC gold adjustable suspension.
Led day running lights.
17" Manaray wheels.
We had the quad exhaust made as the single factory outlets looked a bit small in the bumper cutouts.
Resprayed the whole car and thought we would make it a bit different than all the other NC,s out there.
Mirrors and windscreen surround were painted gloss black along with the wheels,badges and bumper bases.
I like the 2 tone look.
Frt bumper inserts were modified to suit the led lights which work of the key so they cant be left on.
- Attachments
-
-
-
-
-
NicF
- Need, more, 5-ing, time....
- Posts: 185
- Joined: Tue Feb 12, 2013 12:00 pm
- Location: Sth Canterbury
Wrapped my NA and gave her TSIs as well


Wrap is a matt grey metallic with carbon stripes. More time consuming than difficult. I still have some tidying up to do, the front bumper needs to be aligned properly.
The TSIs were dead simple, cost $20 all up.
99 NB MX5
91 NA MX5
92 B2600 offroad
Because RWD is ALWAYS more fun
91 NA MX5
92 B2600 offroad
Because RWD is ALWAYS more fun


-
NicF
- Need, more, 5-ing, time....
- Posts: 185
- Joined: Tue Feb 12, 2013 12:00 pm
- Location: Sth Canterbury
Put some new mirrors on in the weekend. Bought these from Ebay for half the price they are on Trademe. Surprisingly little metalwork needed to fit them.
These are way better than the out-on-an-arm "racing" mirrors you can get. Rock solid, convex glass, and you don't even notice the window frame, you look right past it.
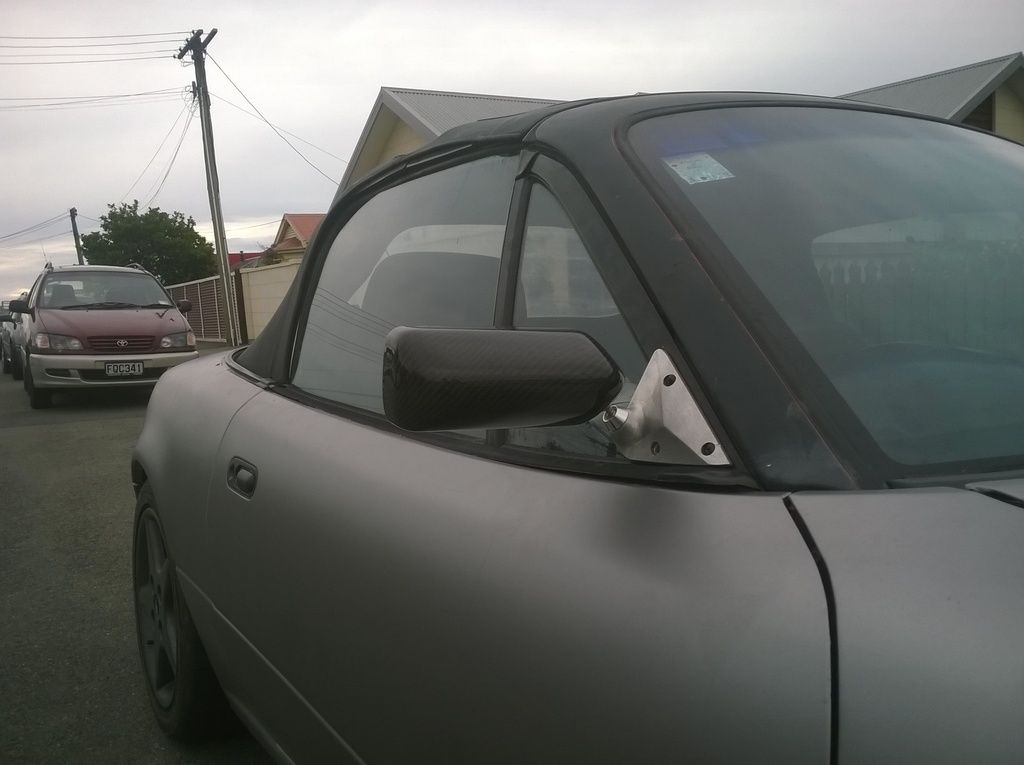
These are way better than the out-on-an-arm "racing" mirrors you can get. Rock solid, convex glass, and you don't even notice the window frame, you look right past it.

99 NB MX5
91 NA MX5
92 B2600 offroad
Because RWD is ALWAYS more fun
91 NA MX5
92 B2600 offroad
Because RWD is ALWAYS more fun
Who is online
Users browsing this forum: Bing [Bot] and 39 guests
